A Practical Guide to the Tile Model in ComfyUI: Image Detail Restoration and High-Definition Upscaling

In the process of image generation and manipulation, a common challenge arises: when using the "Img2Img" function and increasing the Denoising Strength to enhance details, the image content can often change unpredictably. The Tile Model is precisely the tool designed to solve this problem. It is capable of optimizing image details while maintaining the stability of the overall composition, making it ideal for high-definition image upscaling and detail restoration. This tutorial will introduce the fundamental principles of the Tile Model and provide a step-by-step operational guide to help beginner users easily set up a Tile workflow in ComfyUI.
Tile Model Overview: Why It's Perfect for Detail Restoration
The core advantage of the Tile Model lies in its block-processing mechanism. It avoids the destruction of the overall structure by segmenting the image into multiple small blocks and optimizing the details within each block sequentially. This means that even when upscaling an image to a significantly higher resolution, the Tile Model can enhance details while ensuring the coherence of the original content remains intact.For instance, if you have a blurry image and use the Tile Model to boost its resolution from a base value to a higher one, you will notice a significant enhancement in image details (such as textures and edges), yet the main structure remains unchanged. This characteristic makes the Tile Model an ideal choice for processing anime, photographs, or artistic images.
Deep Dive into the Tile Preprocessor: Key Parameter Explanation
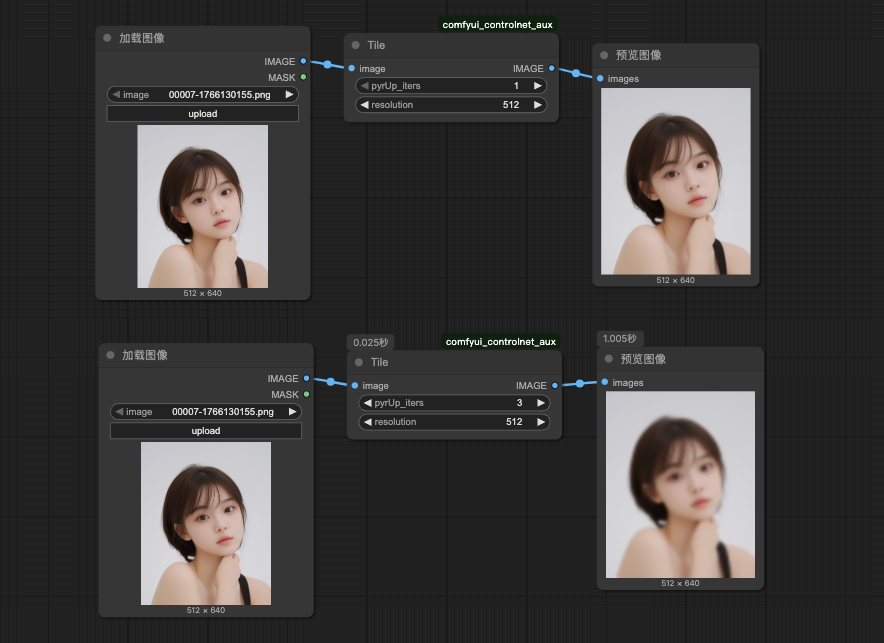
The Tile Model utilizes only one preprocessor: the "Tile Preprocessor" (Tile Tiled Preprocessor). This node contains two main components:
Iterations: Controls the degree of blur applied to the image. A higher value results in a blurrier image. It is generally recommended to set this to 1 to prevent over-processing.
Resolution: Sets the reference resolution for the processing, which is typically set to match the height of the uploaded image.Tip for Usage: Adjust the Iterations based on the image type. For scenarios requiring slight blurring, you might try a higher value, but usually, keeping it at 1 is sufficient.
Setting Up the Tile Workflow: A Step-by-Step Guide
The following detailed steps for setting up a Tile workflow in ComfyUI are suitable for beginner users. We will assume you are familiar with the basic interface and node operations of ComfyUI.
Step 1: Load the Base Workflow and Add the Preprocessor
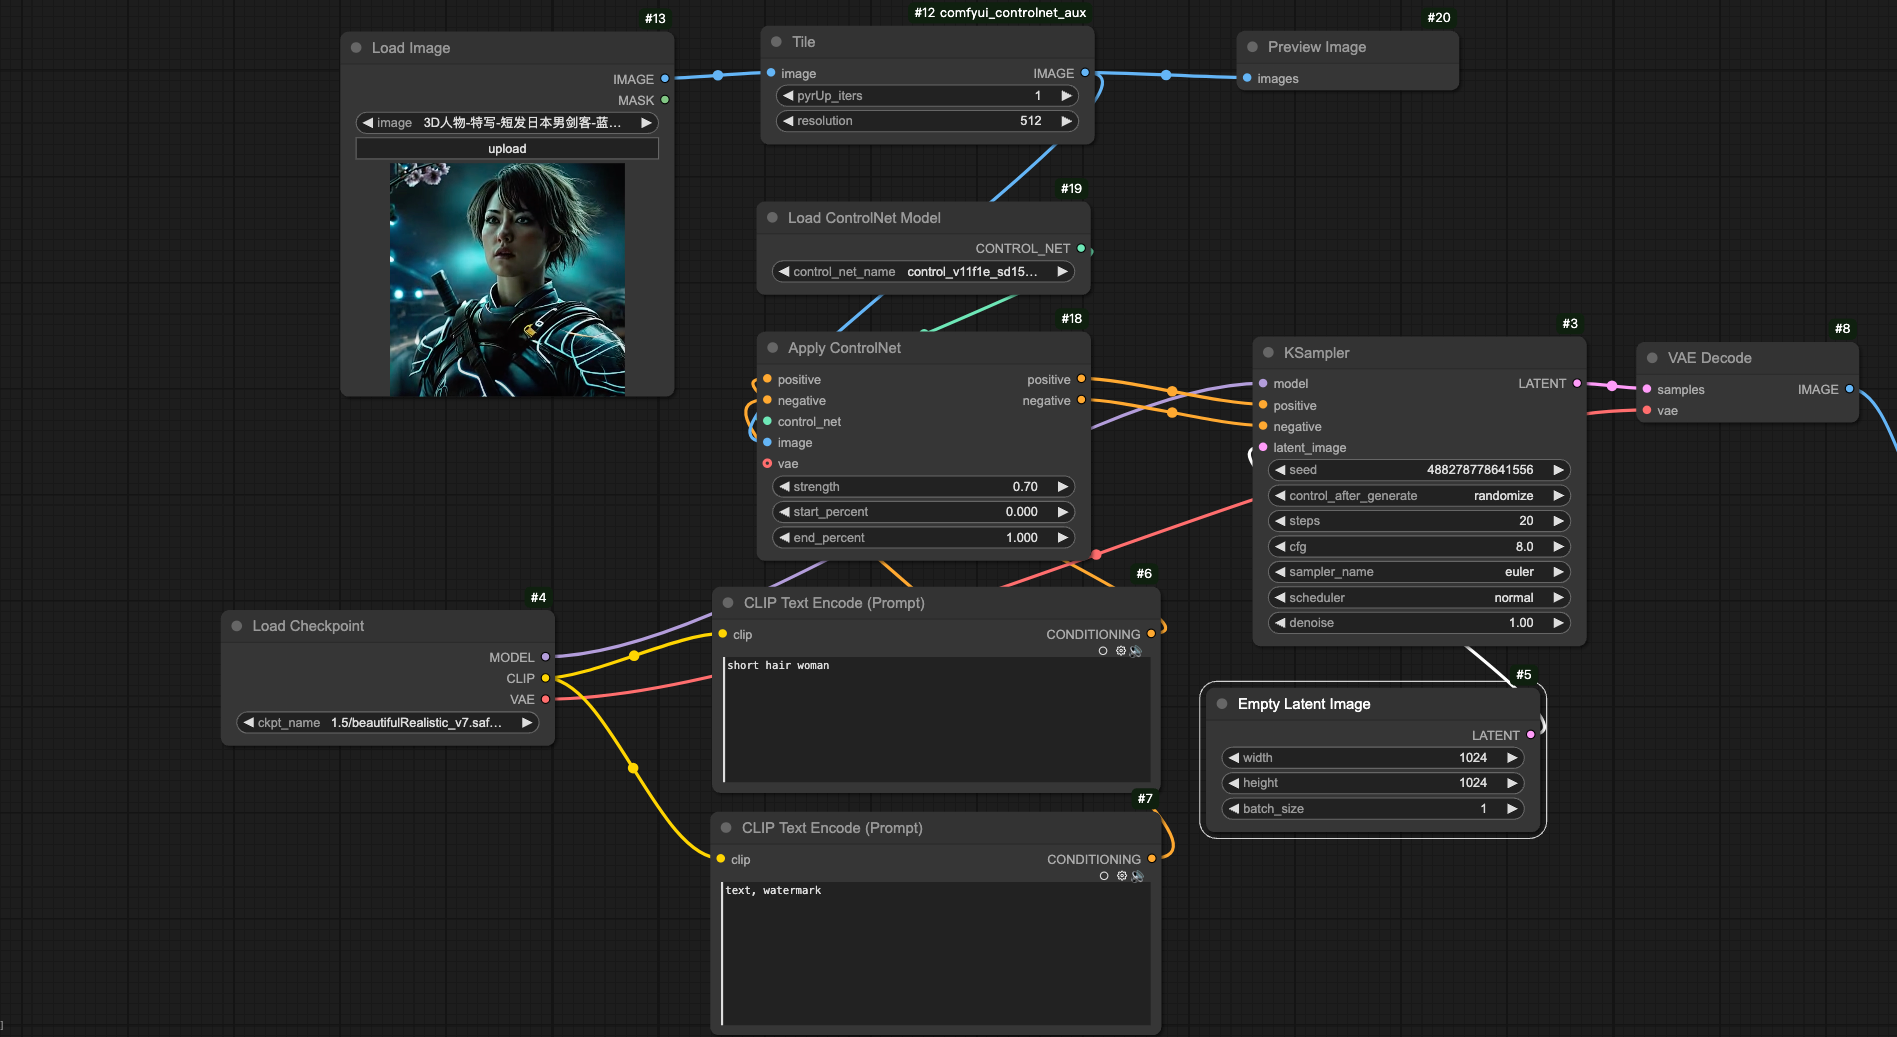
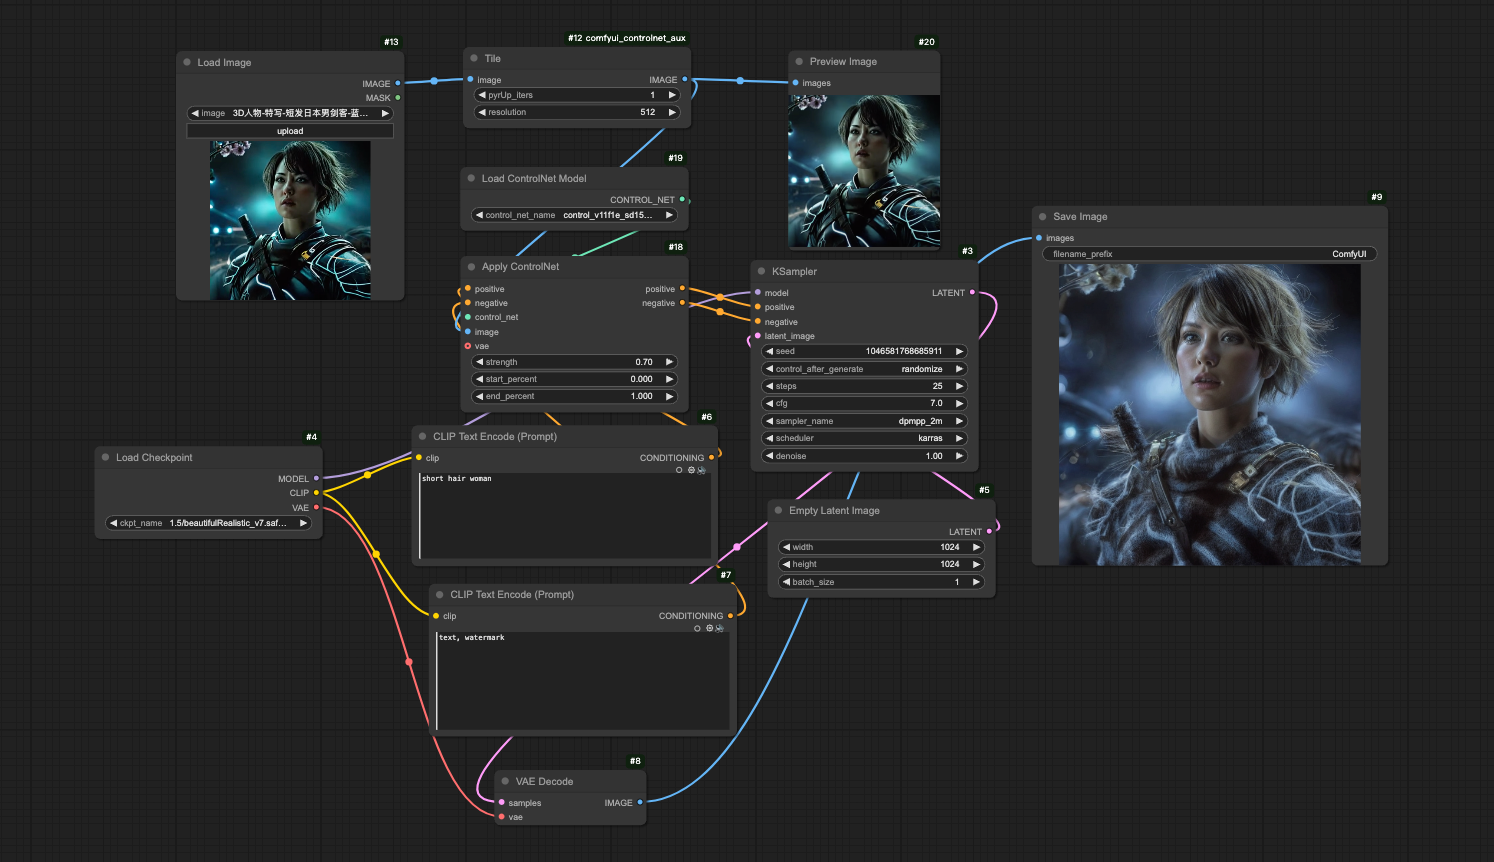
Navigate to the ComfyUI interface and load a Text-to-Image workflow. Create a new "Tile Preprocessor" node and connect it to the "Load Image" and "Preview Image" nodes. Click the "choose file to upload" button in the "Load Image" node to upload the blurry image you intend to process.
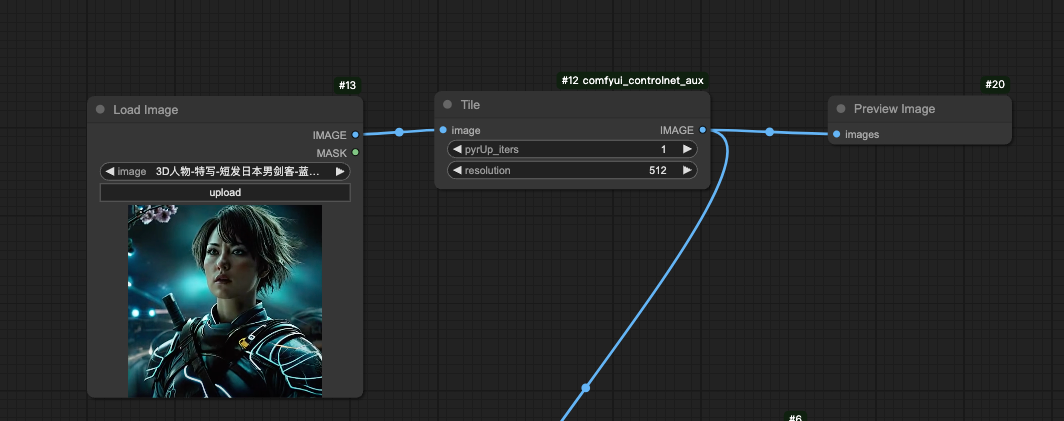
Step 2: Connect the ControlNet Nodes
Create the "ControlNet Apply" and "ControlNet Loader" nodes and connect them. In the "ControlNet Loader," select the Tile Model (e.g., control_v1f_sd15_tile.pth). Then, connect the "image" input port of the "ControlNet Apply" node to the "image" output port of the "Tile Preprocessor" node.
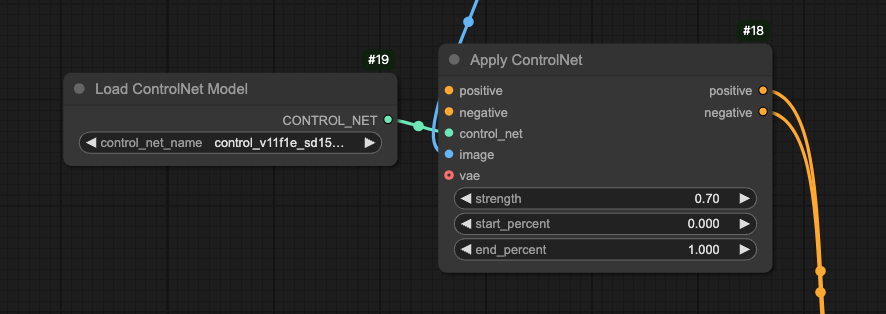
Step 3: Set Up the Conditional Guidance
The ControlNet Apply node serves as a positive condition for image generation. Therefore, its "conditioning" port needs to be connected in series between the "CLIP Text Encoder" and the "K Sampler" nodes. This allows the Tile Model to guide the detail optimization during the generation process.
Step 4: Select the Model and Prompts
Choose an appropriate Checkpoint Model based on the image type. For instance, when working with anime images, you might use counterfeitV30.130.safetensors.In the Positive Prompt box, enter phrases describing a high-quality image (e.g., "best quality, masterpiece, smile, outdoors"). In the Negative Prompt box, input phrases to avoid low quality (e.g., "lowres, error, blurry").
Step 5: Configure Parameters
In the "Tile Preprocessor" node, set Iterations to 1 and the Resolution to match the uploaded image's height (e.g., 320). In the "ControlNet Apply" node, set the Strength to 0.8. In the "Empty Latent" node, set the desired output image dimensions (e.g., $1024 \times 1536$) and adjust the batch size.
Step 6: Adjust K Sampler Settings
In the "K Sampler" node, set the seed to 0, the operation after running to "randomize," steps to 25, CFG to 7, sampler to "dpmpp_2m," scheduler to "karras," and denoise to 1.
Step 7: Generate the Image
Click the "Queue Prompt" button and wait for the processing to finish. You will obtain a high-definition, upscaled image with visibly enhanced details, while the overall composition remains stable.

Conclusion: Practical Applications of the Tile Model
The Tile Model is not just suitable for image upscaling; it is also a powerful tool for restoring details in blurry or low-quality images. With this tutorial, you can quickly get started with the Tile workflow in ComfyUI and apply it to process anime, photos, or other image types. Remember, the key is to adjust the preprocessor parameters and prompts to suit the needs of different scenarios. If you are interested in the latest features of ComfyUI, keep an eye on official updates, such as optimizations to the Tile Model or support for new nodes.Through practice, you will find the Tile Model to be a simple yet powerful tool that helps you easily achieve detail enhancement while maintaining image integrity.
Unlock Full-Powered AI Creation!
Experience ComfyUI online instantly:
https://market.cephalon.ai/share/register-landing?invite_id=RS3EwW
Join our global creator community:
https://discord.gg/MSEkCDfNSW
Collaborate with creators worldwide & get real-time admin support.