A Practical Guide to Inpainting Workflows in ComfyUI: Edit Specific Parts of Your Image with Ease

Inpainting is a commonly used feature in image generation and editing. If you’ve used tools like WebUI before, you’re probably already familiar with the concept. In ComfyUI, inpainting is also built on an image-to-image workflow. In this guide, we’ll walk through how to set up a practical inpainting workflow step by step, perfect for beginners.
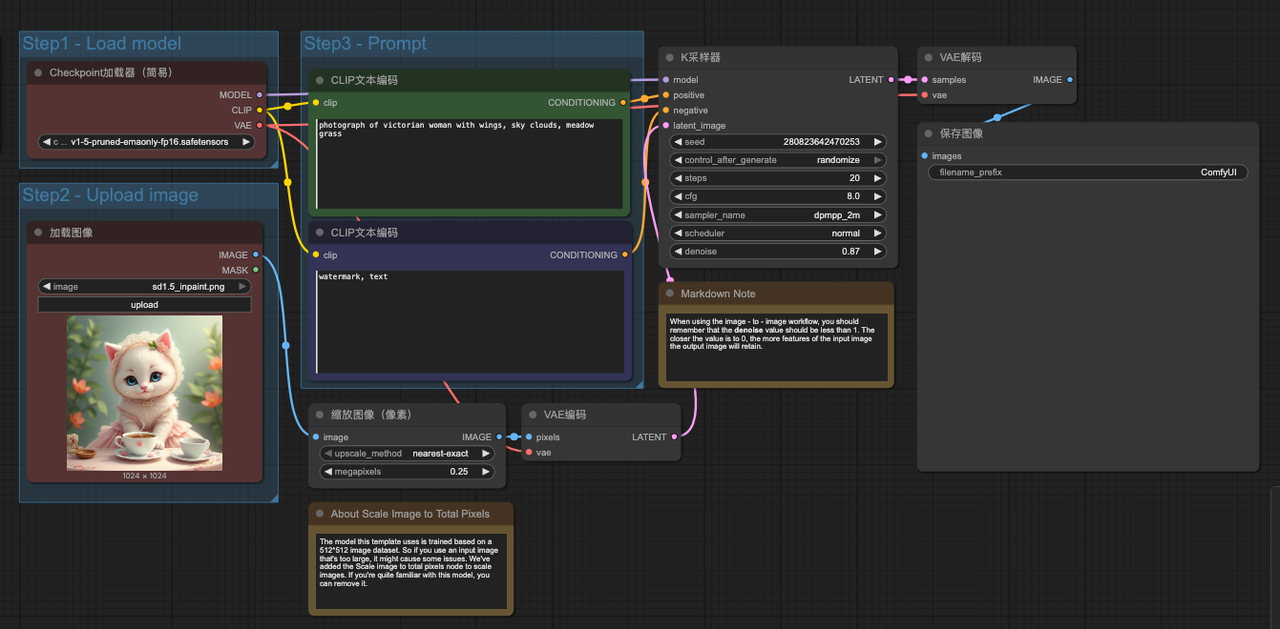
1. Start with a Basic Image-to-Image Workflow
To get started with inpainting, you’ll first need to load a basic image-to-image workflow. You can either load the default image-to-image example in ComfyUI or manually build a structure that includes the following core nodes:
- Lode Image node
- VAE Encode node
- KSampler node
- VAE Decode node
- Preview Image node
This forms the basic skeleton of an image-to-image process. We’ll now extend it to support inpainting.
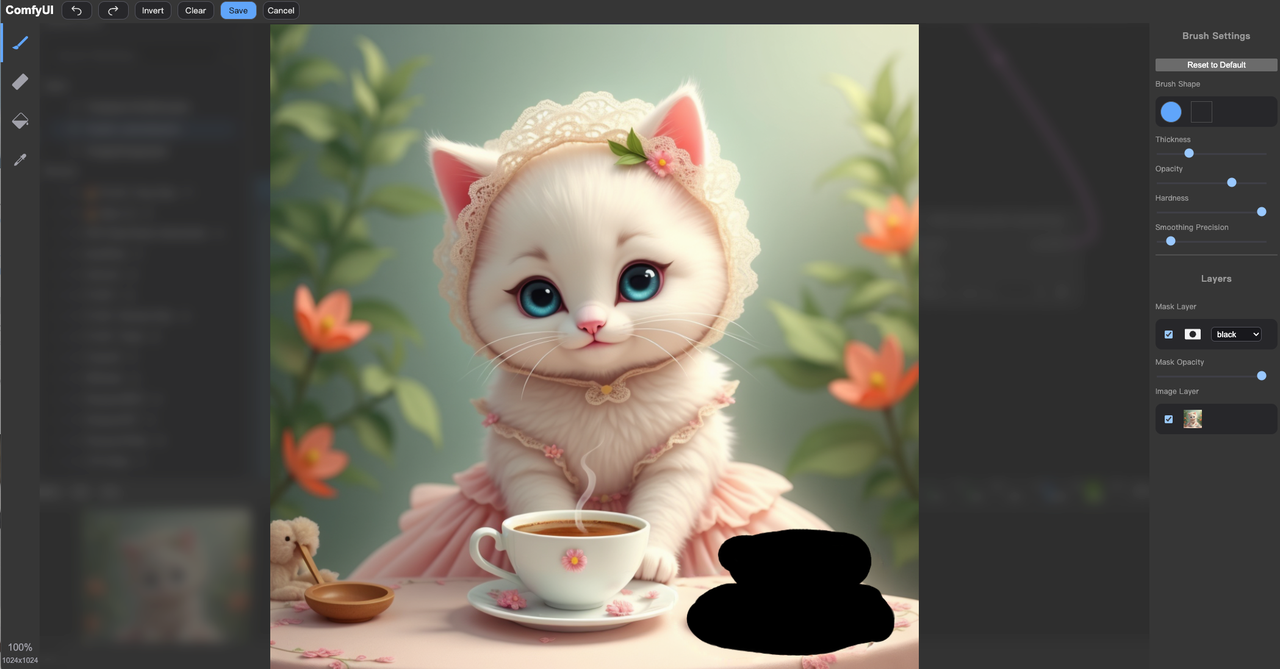
2. Add a Mask to Your Image
The core of inpainting lies in defining "a mask"—a region that indicates which part of the image should be regenerated.
- Upload your base image using the Load Image node.
- Right-click the node and choose "Open in Mask Editor".
- In the mask editor window, adjust the brush size and paint over the area you want to regenerate (e.g., background, clothing, etc.).
- Once you’re done, click the confirm or save button at the bottom right. The mask will now be attached to your image.
Note: If you generate an image at this point, the system will redraw everything outside the mask—which is not what we want. That’s why we need to connect a special node to handle the masked area correctly.
3. Connect a Mask ncoding Node
To help the sampler recognize the masked region, we need to use the "VAE Encode (for Inpainting)" node in place of the standard VAE Encode node.
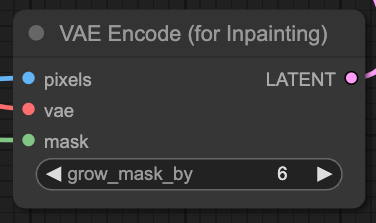
- Delete the original VAE Encode node.
- Go to "Add Node → Latent → Inpainting → VAE Encode (for Inpainting)".
- Connect the image input of this node to the image output of the Load Image node. Then connect the mask input to the mask output of the Load Image node.
- Connect the VAE input to your VAE loader node.
- It’s recommended to set the mask grow parameter to 6 for a smoother transition between regenerated and original areas.
Once connected correctly, both the image and mask information will be passed into the sampler, enabling localized inpainting.
4. Hands-on Example:
Let’s go through a practical example to solidify the process:
(1) Upload an image of a model using the Load Image node.
(2) Create the mask: In the mask editor, paint over the object you wish to replace.
(3) Select a checkpoint: Since we’re working with a animate style, you can use a model like 1.5/3dAnimation Diffusion_v10.safetensors.
(4) Write your prompts:
Positive prompt: Describe the new clothing, e.g., “a pink cake”
Negative prompt: Filter out low-quality elements, e.g., “lowres, text, error, cropped, worst quality”
5. Adjust KSampler settings:
Steps: 25
CFG Scale: 7
Sampler: dpmpp_2m
Denoise: 0.8 (note: going below 0.5 is not recommended, as the effect will be very subtle)
Seed: 0 (or random)
6. Generate and save:
Click "Queue " to run the generation.
Once done, right-click the Preview Image node and select "Save Image" to export your result.

Wrapping Up
With these steps, you can easily perform inpainting in ComfyUI—whether you're replacing a background, modifying clothing, or touching up details. Once you're comfortable with this workflow, you can explore combining it with other nodes like ControlNet or LoRA for even more control.If you're new to ComfyUI, take time to understand what each node does before moving on to more advanced workflows. Happy creating!
Unlock Full-Powered AI Creation!
Experience ComfyUI online instantly:
https://market.cephalon.ai/share/register-landing?invite_id=RS3EwW
Join our global creator community:
https://discord.gg/MSEkCDfNSW
Collaborate with creators worldwide & get real-time admin support.