ComfyUI Practical Guide: Using the Inpaint Preprocessors

The function and usage of Inpaint are similar to local redrawing, except that Inpaint essentially replaces the algorithm for local redrawing in the native text-to-image function. By means of a deep learning model, it analyzes the missing areas in the image and the information of surrounding pixels, intelligently predicts and fills in pixels that match the surrounding environment, thereby achieving natural restoration of the image.
Inpaint Workflow Construction
What differs from other ControlNet preprocessors is that Inpaint has only one preprocessor and no additional components. Meanwhile, the construction of the Inpaint workflow is quite different from other models—since it requires a reference image, its workflow is based on the image generation workflow. The specific setup is as follows:
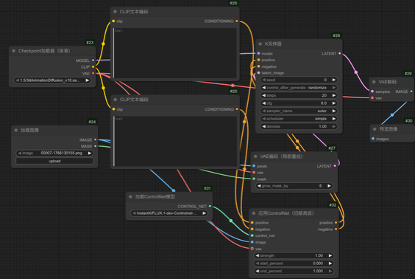
(1) Enter the ComfyUI interface, load the image generation workflow, delete the "VAE Encoder" node, create a "VAE decoder" node, and connect the "Latent" output port of the "VAE decoder" node to the "Latent" input port of the "K Sampler" node. Then connect the output port of the "Checkpoint Loader" node to the "VAE" input port of the "VAE" node.
(2) Create and connect the "ControlNet Apply" and "ControlNet Loader" nodes. In the "ControlNet Loader," select the Inpaint model "control_v1p_sd15_inpaint_fp16.safetensors." Connect the "image" output port of the "Inpaint Preprocessor" node to the "image" input port of the "ControlNet Apply" node.
(3) In the workflow, the "ControlNet Apply" node acts as a positive condition to guide the generation, so connect the "condition" port of the "ControlNet Apply" node in series between the "CLIP Text Encoder" node and the "K Sampler" node, as shown in the figure below.With this, the Inpaint workflow is fully set up.
Practical Operation
Although the Inpaint workflow has been set up, it still requires creating a mask image for use. Here, we’ll walk through the Inpaint workflow step-by-step using a product scene case, and explain the case settings in detail. The specific operation steps are as follows:
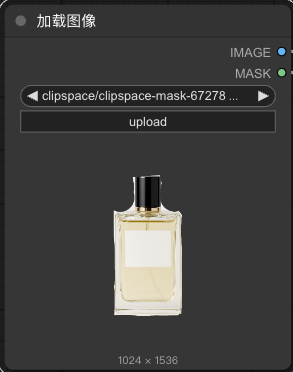
(1) Enter the ComfyUI interface. In the "Load Image" node, click the "choose file to upload" button to upload the prepared product material image. Right-click on the "Load Image" node, and select the "Open in mask editor" option from the pop-up menu to open the mask editor window.
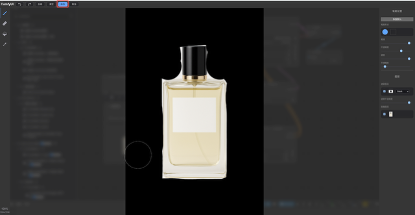
(2) In the mask editor window, use the brush to paint over the white areas of the image—completely cover all white parts except the perfume bottle. Click the "Save to node" button in the bottom right corner of the window. The masked image will then be displayed in the "Load Image" node.
(3) Since the image to be partially redrawn is a photorealistic e-commerce-style image: select the photorealistic Checkpoint model “majicmixRealistic_v7.safetensors”.
(4) In the positive prompt box, enter a description of the new background. Here, we input: "still life, indoors, spot backdrop, pink flower, best quality, masterpiece, bottle, solo". In the negative prompt box, enter prompts for undesirable image quality: "lowres, text, error, extra digit, fewer digits, cropped, worst quality, low quality, normal quality, jpeg". Set the "Strength" of the "ControlNet Apply" node to 1, as shown in the figure below.

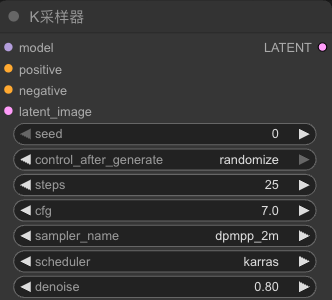
(5) In the "K Sampler" node:
• Set "Random Seed" to 0
• Set "Post-run Action" to "randomize"
• Set "Steps" to 25
• Set "CFG" to 7
• Set "Sampler" to "dpmpp_2m"
• Set "Scheduler" to "karras"
• Set "Denoise" to 0.8
As shown in the figure below. Note that the "Denoise" value should not be set below 0.5, otherwise the redrawing effect will be very unnoticeable.
(6) Click the "Add Prompt Queue" button, and an image of the product with a new background will be generated.
Unlock Full-Powered AI Creation!
Experience ComfyUI online instantly:
https://market.cephalon.ai/share/register-landing?invite_id=RS3EwW
Join our global creator community:
https://discord.gg/MSEkCDfNSW
Collaborate with creators worldwide & get real-time admin support.