Complete Guide to Installing and Using ControlNet in ComfyUI (Beginner-Friendly)


When working with Stable Diffusion (SD), you may have noticed how unpredictable the results can be — generating the same prompt several times often gives entirely different images.
ControlNet was created to fix exactly that problem.
By using Conditional Generative Networks, ControlNet allows you to provide structured visual guidance — such as poses, sketches, or depth maps — so the model can generate results that follow your intended structure instead of leaving everything to randomness.
This tutorial walks you through how to install and use ControlNet in ComfyUI, step by step:
- Install ControlNet preprocessors
- Install ControlNet models
- Set up and connect ControlNet nodes in ComfyUI
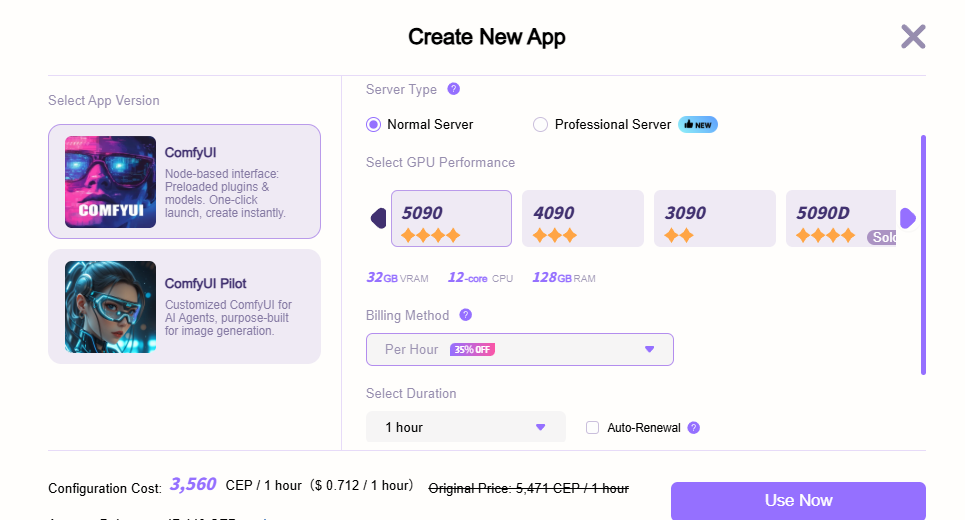
On the Cephalon Cloud platform, skip the complex installation process—simply create a ComfyUI application to directly experience the powerful image control capabilities of the ControlNet plugin.
The platform offers multiple GPU configurations and abundant model resources to meet various creative needs. You can easily access high-performance RTX 5090 graphics cards in the cloud, benefiting from faster rendering and greater stability—all for just $0.712 per hour. This makes creation more efficient and economical.
What Is ControlNet?
ControlNet is an extension for Stable Diffusion that adds extra control inputs to the generation process.
With it, you can guide your image using visual references such as:
- Human pose or body position
- Object contours or edges
- Depth maps, segmentation maps, sketches, or line art
In other words, ControlNet helps the AI understand your intended composition and structure, giving you much more control over what the model generates.
Installation Steps
To use ControlNet in ComfyUI, you’ll need to install two parts:
- ControlNet Preprocessors – Convert reference images (e.g., sketches or poses) into structured data that the model can understand.
- ControlNet Models – The actual models that process the structured data to influence image generation.
Let’s go through these one by one.
1. Installing ControlNet Preprocessors
- Open ComfyUI and click the Manager button on the right sidebar.
- In the ComfyUI Manager window, select Install Custom Nodes.
- Use the search bar at the top right and type “ControlNet”.
- Find the package named
ControlNet-Auxand click Install.
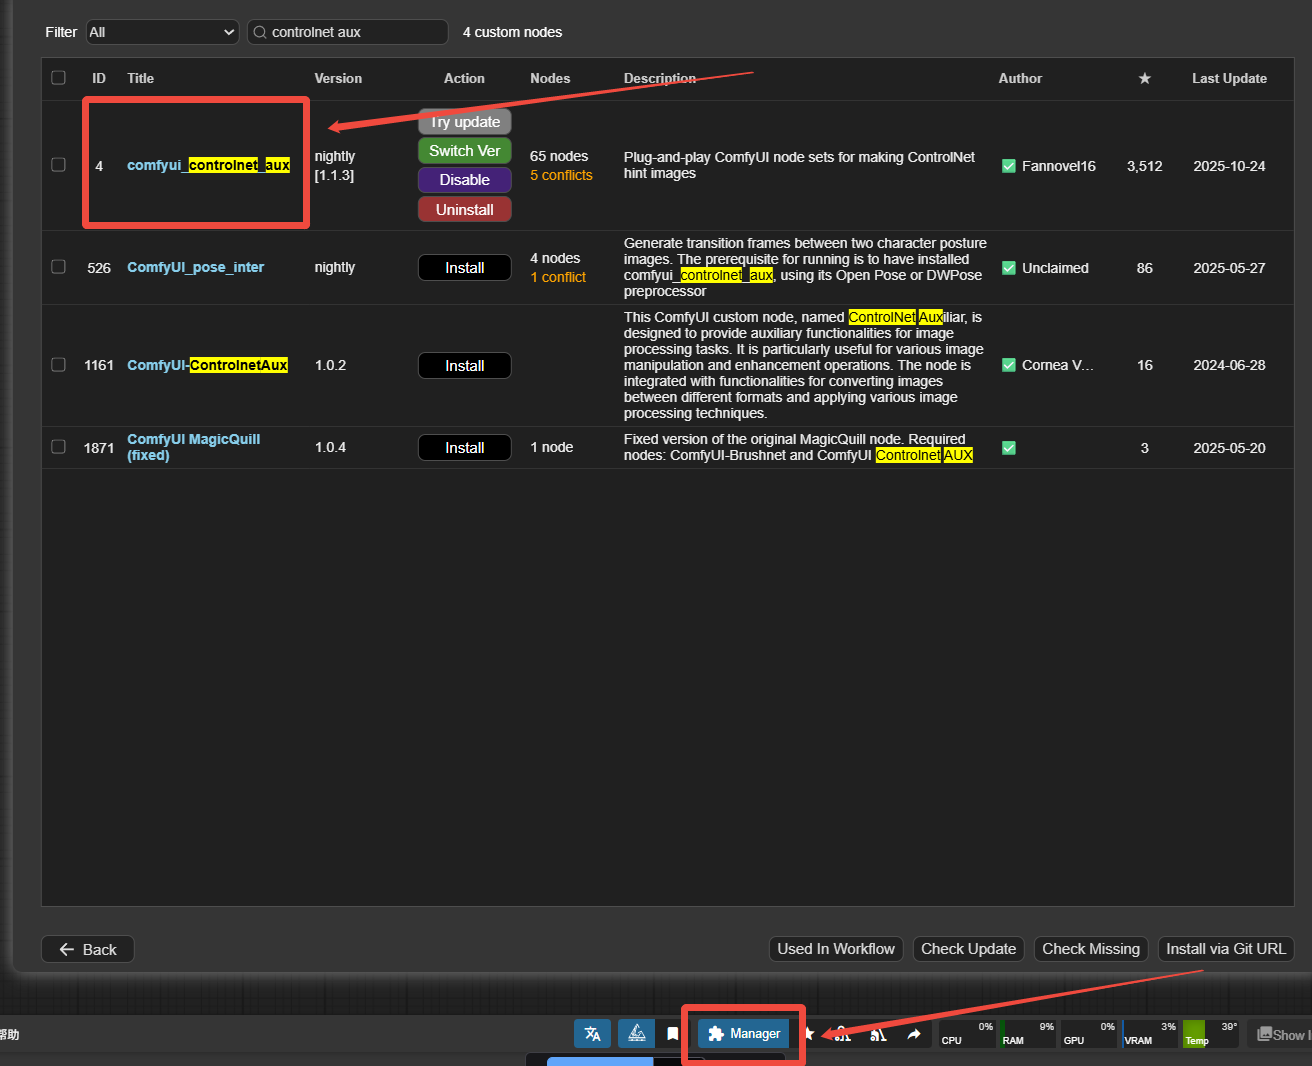
⚠️ Important Notes:
- Do not install the old
comfy_controlnet_preprocessorsplugin — it’s deprecated. - The new auxiliary preprocessors are actively maintained.
- If you already installed the old one, uninstall it before installing the new version.
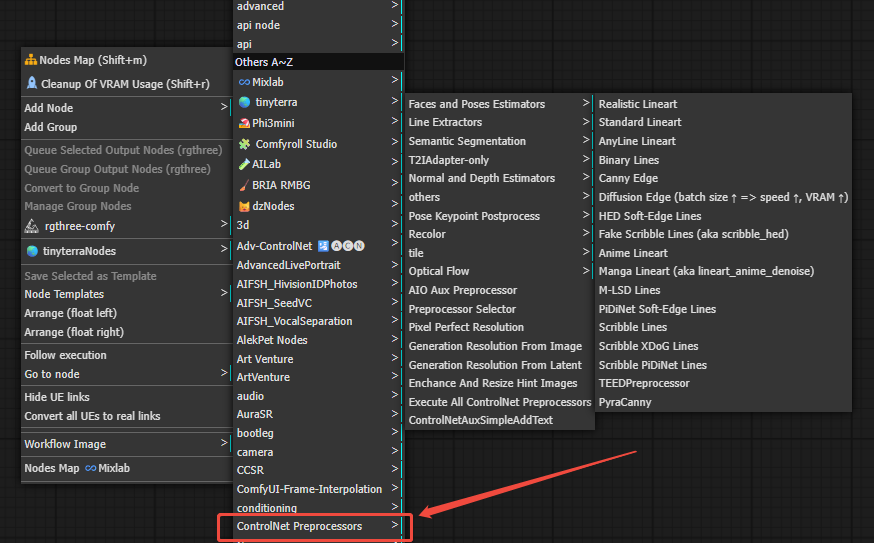
After installation, restart ComfyUI.
You’ll now see a “ControlNet Preprocessors” category when right-clicking to add new nodes, including popular options like Canny, Depth, and Pose.
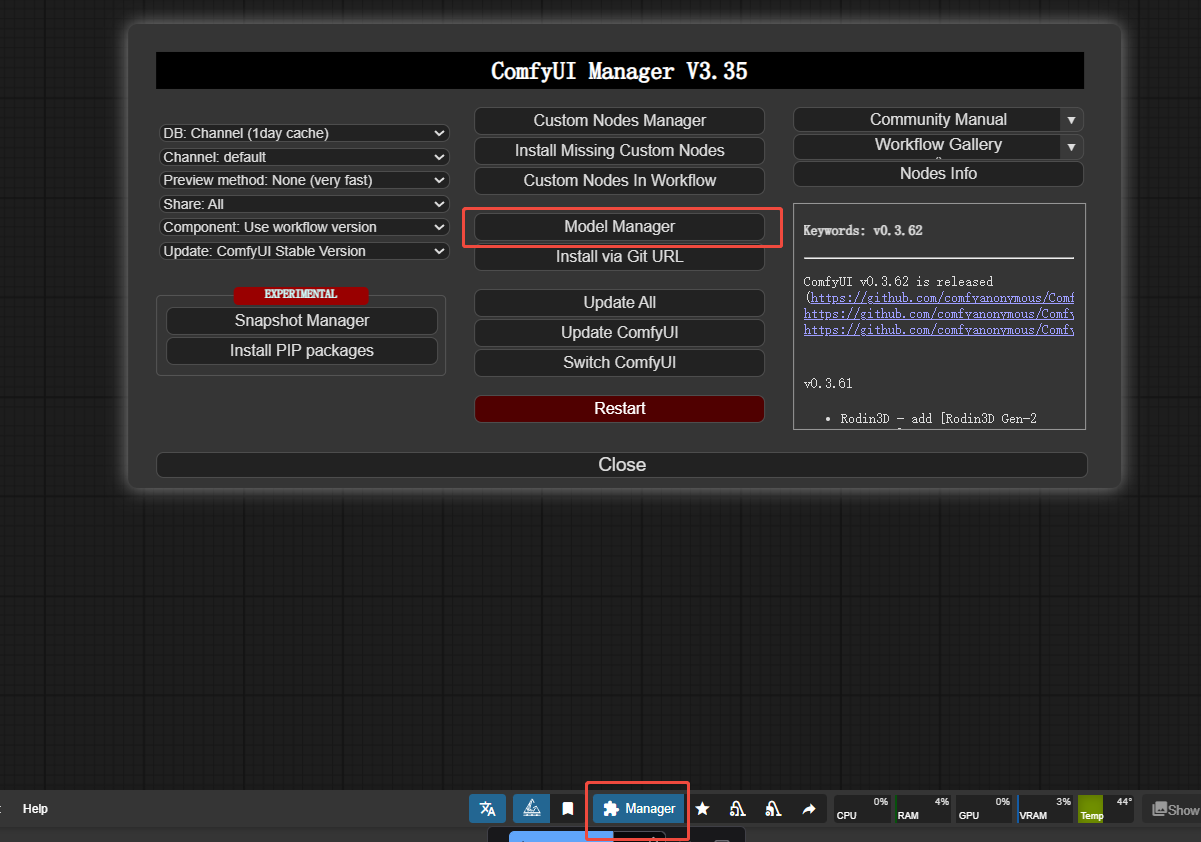
2. Installing ControlNet Models
- Go back to the ComfyUI Manager window and click Models Manager.
- Search for “ControlNet” in the top-right bar.
- Choose the model version that matches your base Stable Diffusion version (e.g., SD1.5 or SDXL).
You can also download the models manually:
Official model repository (Hugging Face):
👉 https://huggingface.co/lllyasviel/ControlNet-v1-1/
Download the model you need (e.g. control_v11p_sd15_depth.pth)
Place the file in:
ComfyUI/models/controlnet/
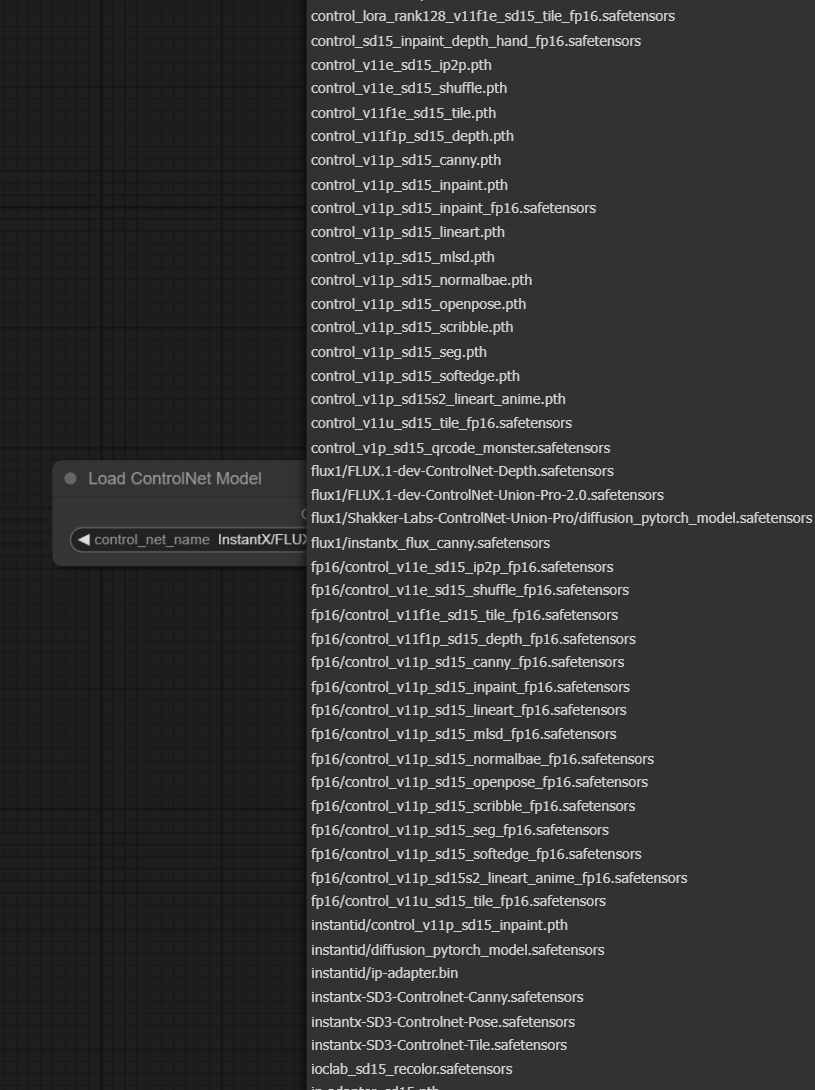
Once placed, create a Load ControlNet Model node in ComfyUI — your new models should appear automatically in the dropdown.
💡 Tip:
If you’ve previously installed ControlNet models in Automatic1111 WebUI, ComfyUI can use those same files directly, as long as they’re in the same directory path.
ControlNet 1.1 Model Version Overview
In ControlNet 1.1, the number of models has increased from the previous 1.0 version to 14, with a more standardized naming convention.
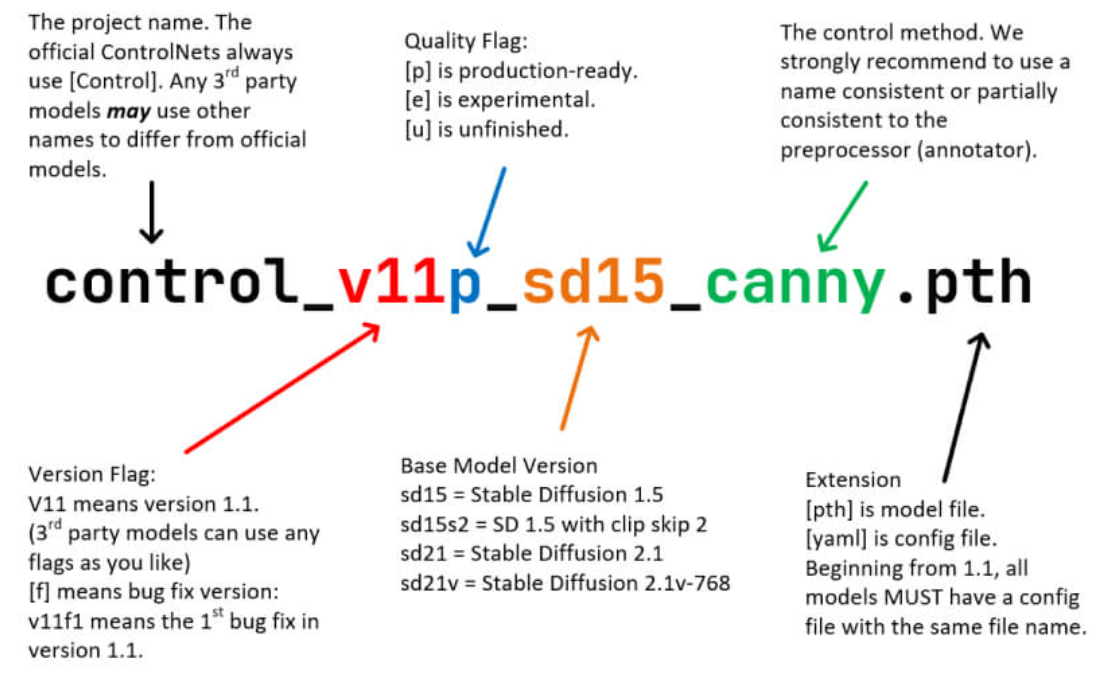
The naming rule is:
“Version + Model Status + Stable Diffusion Version + Model Type”
For example: control_v11p_sd15_canny.
Model Status Description
ControlNet 1.1 introduces three model statuses to help users distinguish between stability and use cases:
| Status | Meaning | Features & Use Cases |
|---|---|---|
| p | Production | Stable and recommended for most users and beginners. Naming format: Control_VxxyP_. |
| e | Experimental | Still in testing; results may vary. Suitable for research or exploration. Naming format: Control_VxxyE_. |
| u | Unfinished | Incomplete and not recommended for production use. Naming format: Control_VxxxU_. |
Naming Examples
Here are some common examples to help you quickly understand version differences:
control_v11p_sd15_canny→ Version 1.1 Production, based on SD1.5, using the Canny edge detection modelcontrol_v11e_sd15_depth→ Version 1.1 Experimental, based on SD1.5, using the Depth modelcontrol_v11u_sd15_pose→ Version 1.1 Unfinished, based on SD1.5, used for pose control
Using ControlNet in ComfyUI
In ComfyUI, ControlNet works through a few interconnected nodes. Here’s how they function and connect.
1. ControlNet Loader
Path:Loaders > ControlNet Loader
Purpose: Loads a ControlNet model file.
Output: ControlNet
Connects to: The ControlNet input of the ControlNet Apply node.
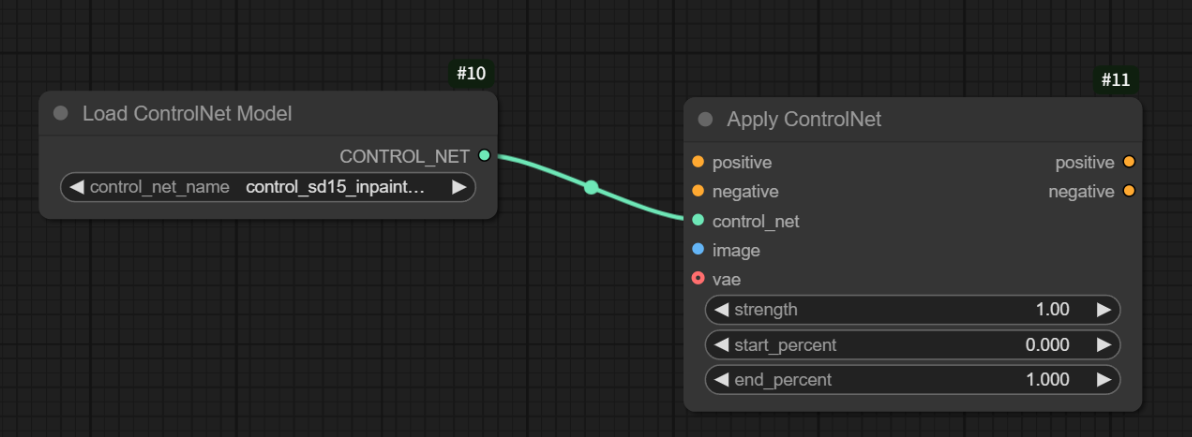
2. ControlNet Apply
Path: Conditioning > ControlNet Apply
Purpose: Combines your text prompt, ControlNet model, and preprocessed image into a conditioning signal that guides image generation.
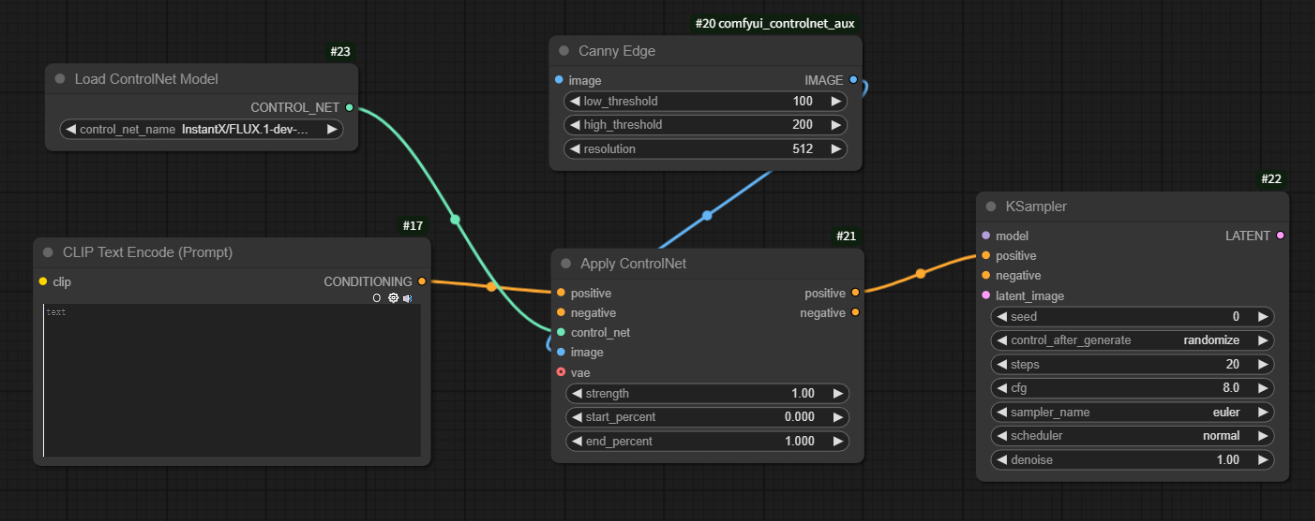
Typical setup:CLIP Text Encoder → ControlNet Apply → KSampler
Inputs:
Condition (from CLIP encoder)
ControlNet (from ControlNet Loader)
Image (from ControlNet Preprocessor)
Output:
Condition (connect this to the positive conditioning input of your sampler)
You can chain multiple ControlNet Apply nodes to combine multiple conditions — for example, Pose + Edges + Depth — giving you multi-layered control over the generation process.
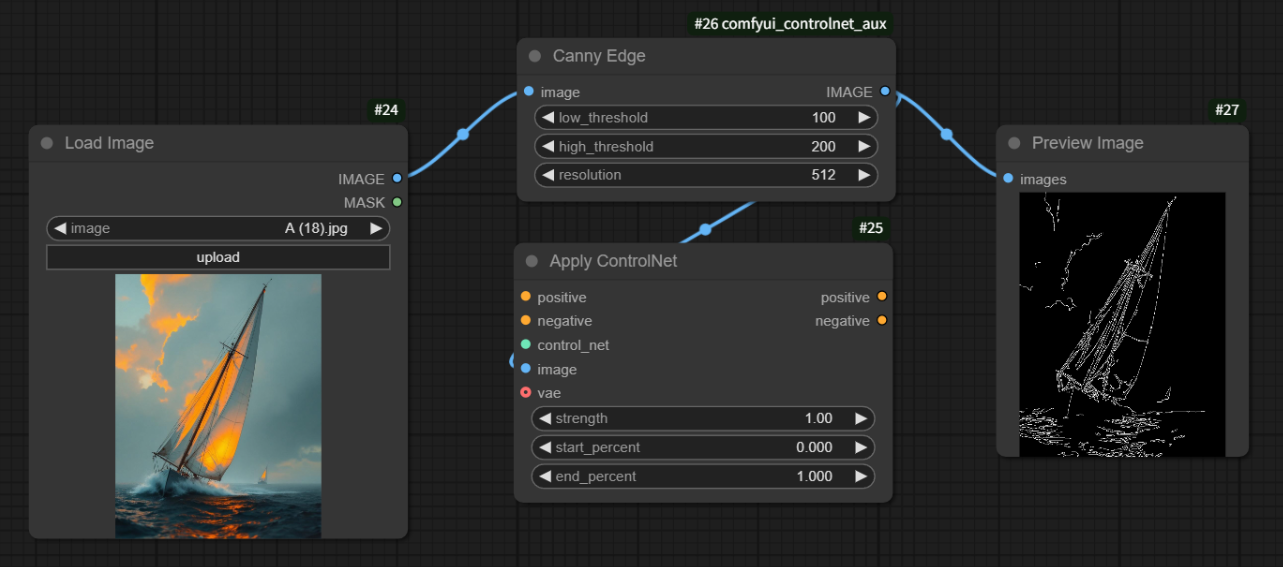
3. ControlNet Preprocessor
Path: ControlNet Preprocessors
Purpose: Converts an image into a structural guide (e.g., edge map, pose, depth map).
Input: Image
Output: Image
Connects to: The Image input of the ControlNet Apply node.
You can preview the preprocessed result by connecting it to a “Preview Image” node.
What’s Next?
ControlNet includes a wide range of model types — such as pose, line art, segmentation, normal map, and depth.
In upcoming tutorials, we’ll explore each of these with practical ComfyUI workflow examples so you can learn how to build advanced, controllable generation pipelines step by step.
✅ Summary
ControlNet transforms Stable Diffusion from a random generator into a controllable creative tool.
Whether you want to lock character poses, maintain scene structure, or refine image consistency, ControlNet is one of the most essential tools to learn.
With ComfyUI’s visual, node-based workflow, using ControlNet becomes much easier and intuitive — perfect for both beginners and advanced creators alike.
Unlock Full-Powered AI Creation!
Experience ComfyUI online instantly:
https://market.cephalon.ai/share/register-landing?invite_id=RS3EwW
Join our global creator community:
https://discord.gg/MSEkCDfNSW
Collaborate with creators worldwide & get real-time admin support.