LoRA Part 1: Building Your LoRA Model Workflow


In the Part 2, we introduced you how to build your first ComfyUI text-to-image workflow. Based on this, we will introduce you to the construction of the LoRA model workflow.
Load LoRA Node Introduction
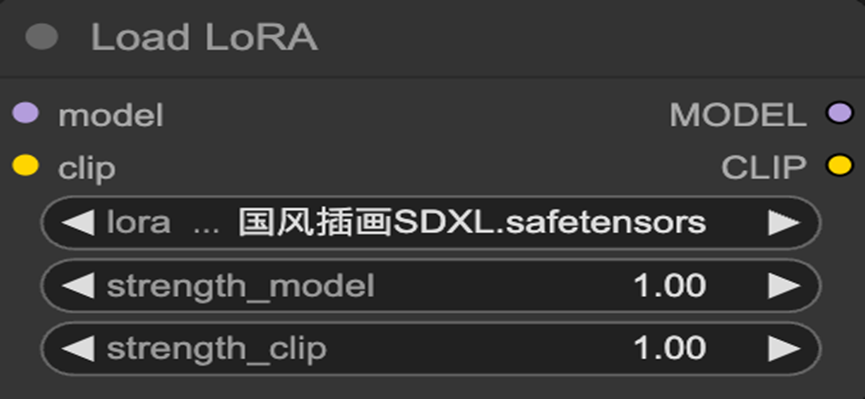
The "Load LoRA "node is used to load LoRA models and configure model weights. Its input and output ports are "Model" and "CLIP".
Therefore, the "Load LoRA"node should be placed between the "Load Checkpoint" node and the "CLIP Text Encode" node.
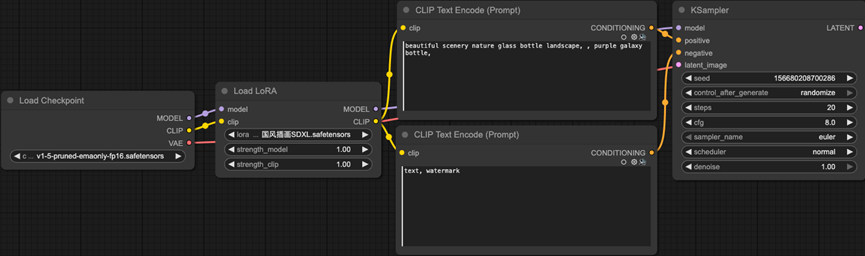
Load LoRA Node Connection
- Link the Model output port of the Load Checkpoint node to the model input port of the Load LoRA node.
- Link the CLIP output port of the Load Checkpoint node to the clip input ports of the Load LoRA node.
- Link the Model output port of the Load LoRA node to the Model input port of the K Sampler node.
- Link the CLIP output port of the Load LoRA node to the CLIP input ports of both the positive and negative CLIP Text Encoder nodes.
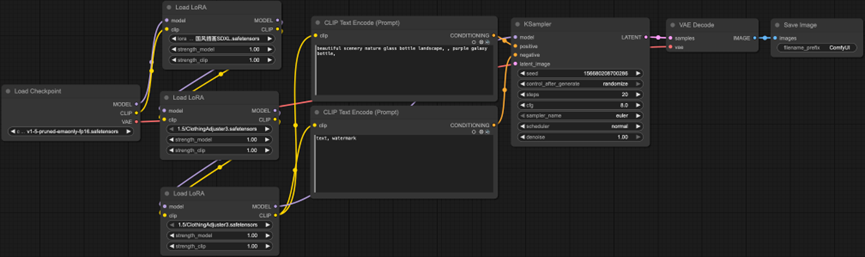
Notice: If you want to use multiple LoRA model nodes
- Link the Model(CLIP) output port of the first Load LoRA node to the model(clip) input port of the second Load LoRA node.
- Link the Model(CLIP) output port of the second Load LoRA node to the Model(clip) input port of the next Load LoRA node(until the last Load LoRA node).
- Link the Model output port of the last Load LoRA node to the model input port of the K Sampler node.
- Link the CLIP output port of the last Load LoRA node to the clip input ports of both the positive and negative CLIP Text Encoder nodes.
Connect the Prompts
- Link the Conditioning output port of the Positive Prompt CLIP node to the positive input port of the K Sampler node.
- Link the Conditioning output port of the Negative Prompt CLIP node to the negative input port of the K Sampler node.
Set Canvas Dimensions
- Link the LATENT output port of the Empty Latent Image node to the latent_Image input port of the K Sampler node.
Decode and Display the Image
- Link the LATENT output port of the K Sampler node to the samples input port of the VAE Decode node.
- Link the VAE output port of the Load Checkpoint node to the vae input port of the VAE Decode node.
- Link the IMAGE output port of the VAE Decode node to the images input port of the Save Image node.
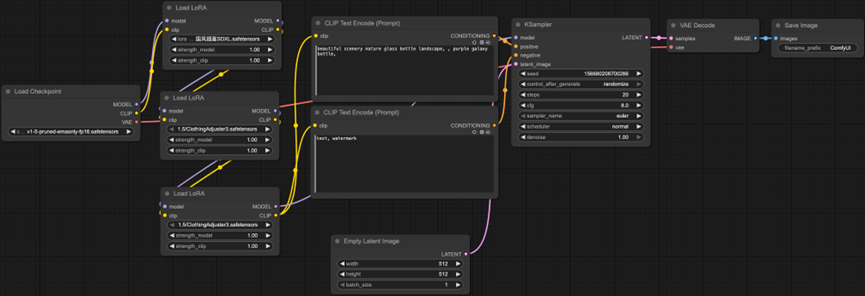
At this point, a complete text-to-image workflow with Load LoRA node is successfully built! Your node network should form a logical data flow chain.
Unlock Full-Powered AI Creation!
Experience ComfyUI online instantly:
https://market.cephalon.ai/share/register-landing?invite_id=RS3EwW
Join our global creator community:
https://discord.gg/MSEkCDfNSW
Collaborate with creators worldwide & get real-time admin support.