Part 2: A Guide to Model-Based and High-Resolution Fix Upscaling in ComfyUI

Overview
In the previous article, we explored Non-Model Upscaling — a fast, algorithm-based method to enlarge images.
While it’s simple and efficient, the improvements in detail after upscaling are still quite limited.
In this guide, we’ll take a closer look at Model-Based Upscaling and High-Resolution Fix Upscaling.
Both approaches rely on deep learning models to enhance resolution and overall image quality, producing results that look sharper and more natural.
1. Model-Based Upscaling
Model-based upscaling enhances image clarity using AI models.
Instead of inventing new details, it refines what’s already there based on learned visual features.
This method is fast and ideal for quickly improving the clarity of generated images.
1.1 Node Overview
Model upscaling mainly depends on two nodes:
Image Upscale With Model
Upscale Model Loader
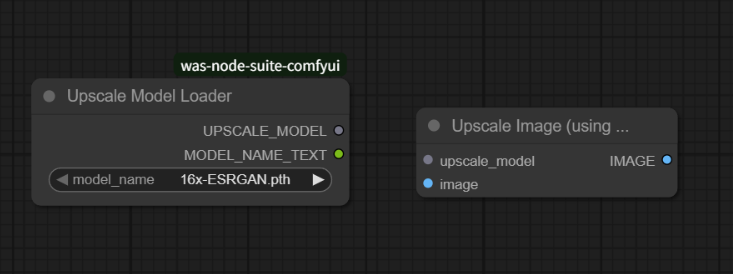
The Upscale Model Loader lets you select a specific model (for example, 4x-UltraSharp.pth) and connect its output to the Image Upscale With Model input port.
The “4x” in the model name indicates the upscale factor.
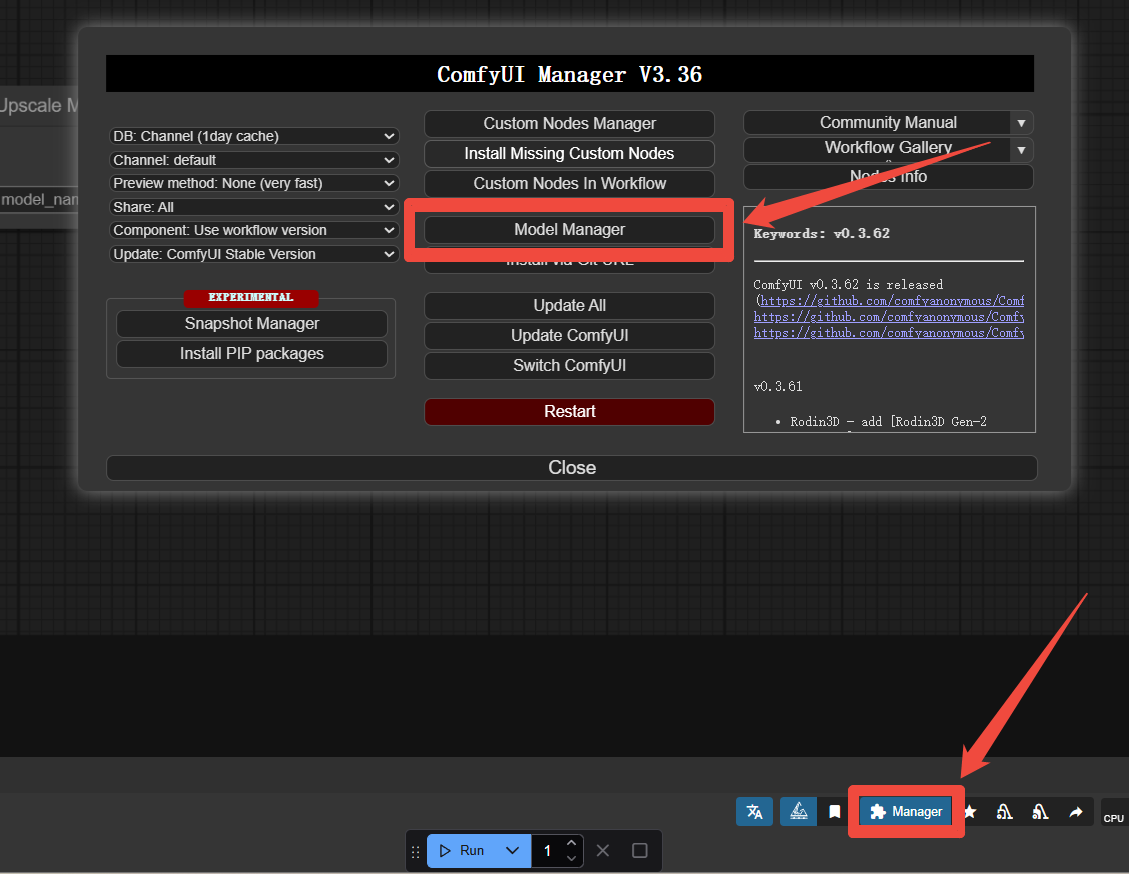
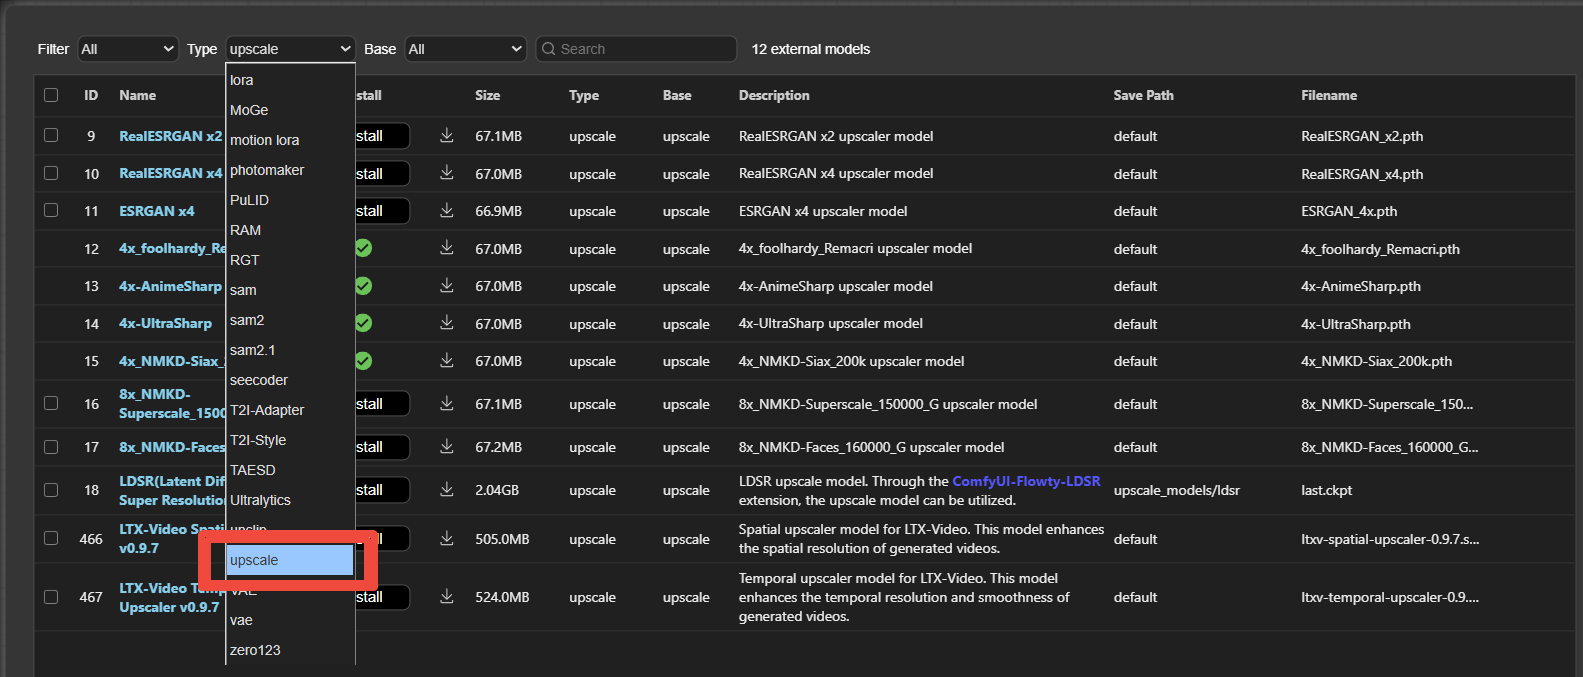
If you don’t have any upscaling models installed yet, you can go to
Manager → Install Model, and search for models with the type “upscale”.
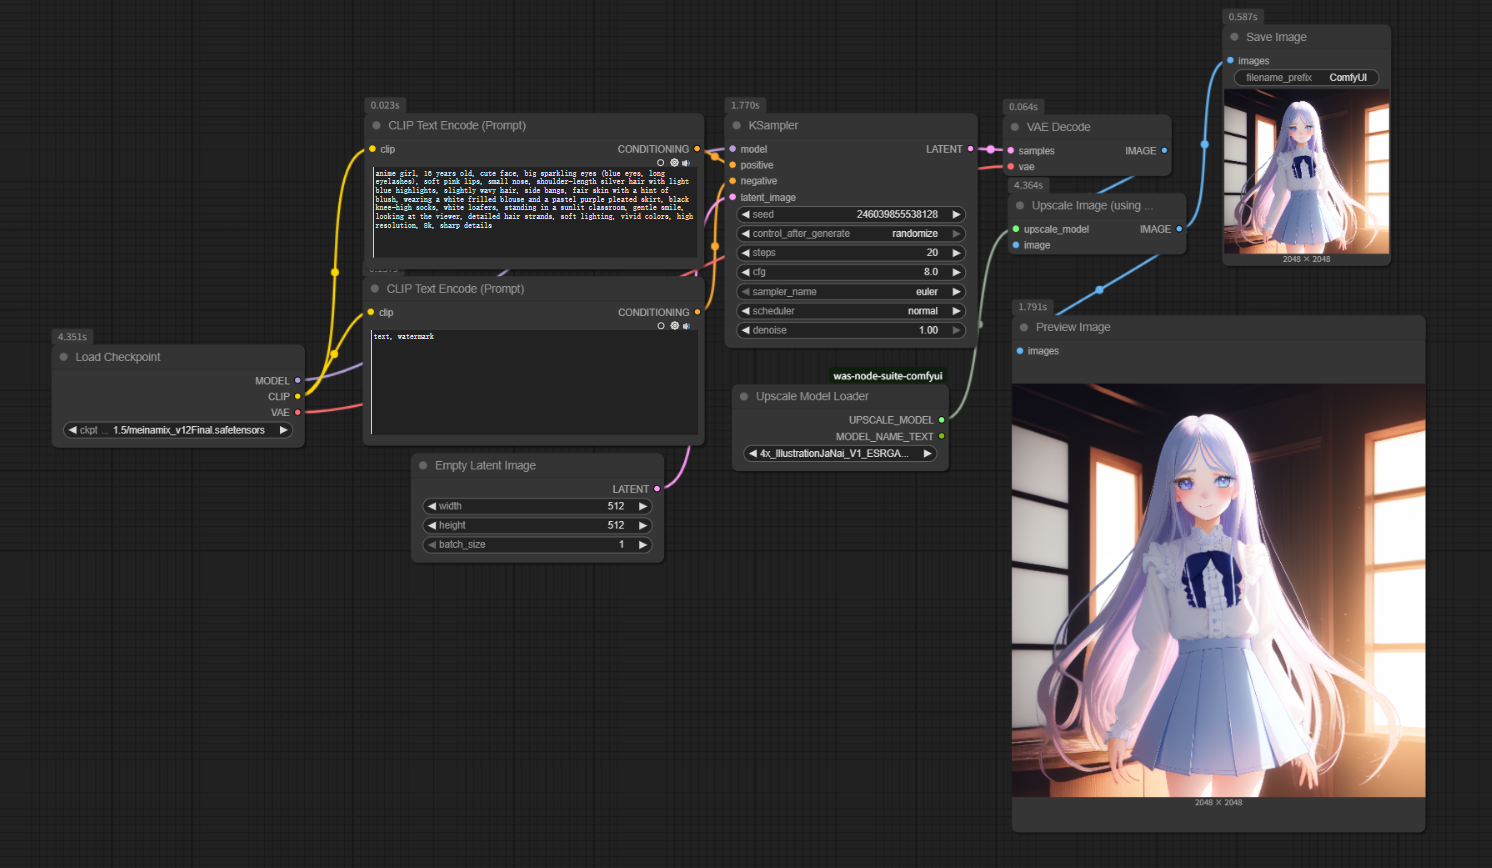
1.2 Example Workflow
The Model Upscale node is usually placed at the final stage of the generation process:
1.Connect the VAE Decode node’s output to Image Upscale With Model.
2.Then, connect its output to Preview Image.
3.Click Generate to produce the upscaled high-resolution result.
For anime-style images, this method can quickly yield sharper lines and clearer edges.
2. High-Resolution Fix Upscaling
If you want to not only upscale but also repair issues like distorted fingers, blurry faces, or missing details,
use High-Resolution Fix Upscaling.
It works much like Highres Fix in WebUI, but in ComfyUI, you can build it flexibly through node combinations.
2.1 How It Works
Unlike standard upscaling, this process happens in the latent space:
1.Generate the initial image in latent space.
2.Use the Latent Upscale node to enlarge it.
3.Run a second K Sampler for additional denoising and refinement.
4.Finally, decode with VAE Decode to get the high-resolution repaired image.
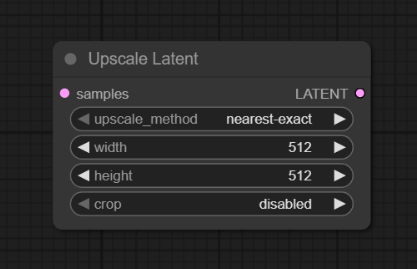
You can find the Latent Upscale node here:
Add Node → Latent → Latent Upscale
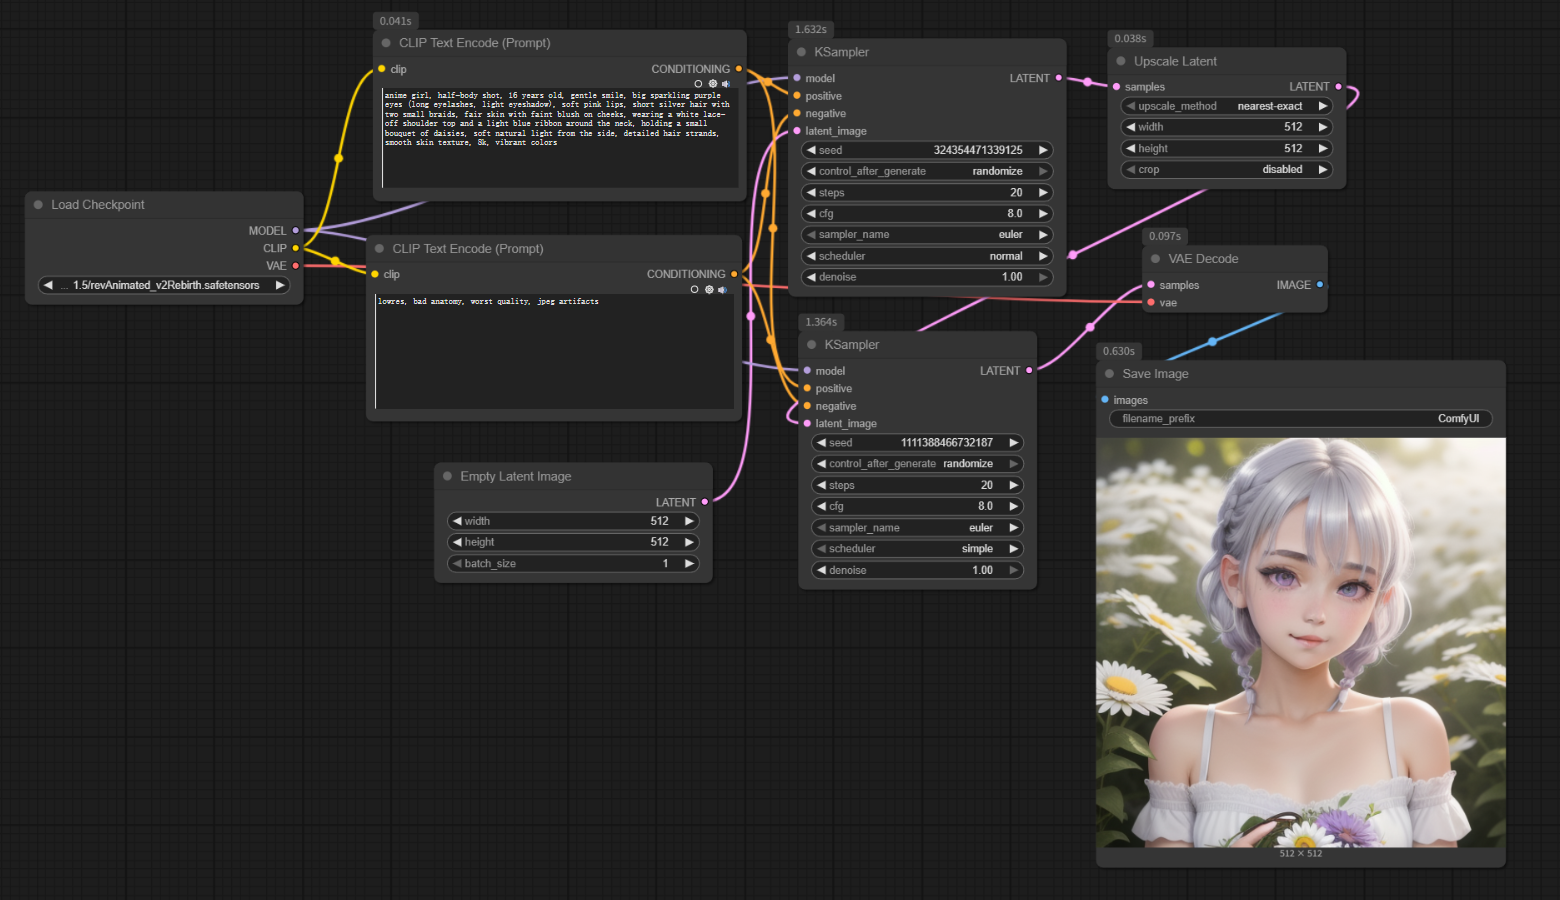
2.2 Workflow Steps
Here’s how to set up the high-resolution fix workflow:
1.Disconnect the original link between the first K Sampler’s latent output and VAE Decode’s input.

2.Add a Latent Upscale node and connect it to the first K Sampler’s output.
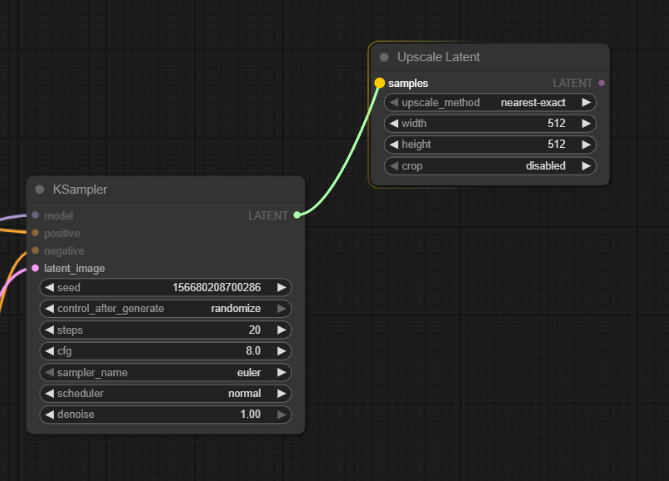
3.Add a second K Sampler node:
- Connect the Latent Upscale output to its input.
- Keep the same Checkpoint Loader and positive/negative prompts as before.
- Finally, connect the second K Sampler’s output back to VAE Decode.
Once done, you’ll have a complete high-resolution fix workflow.
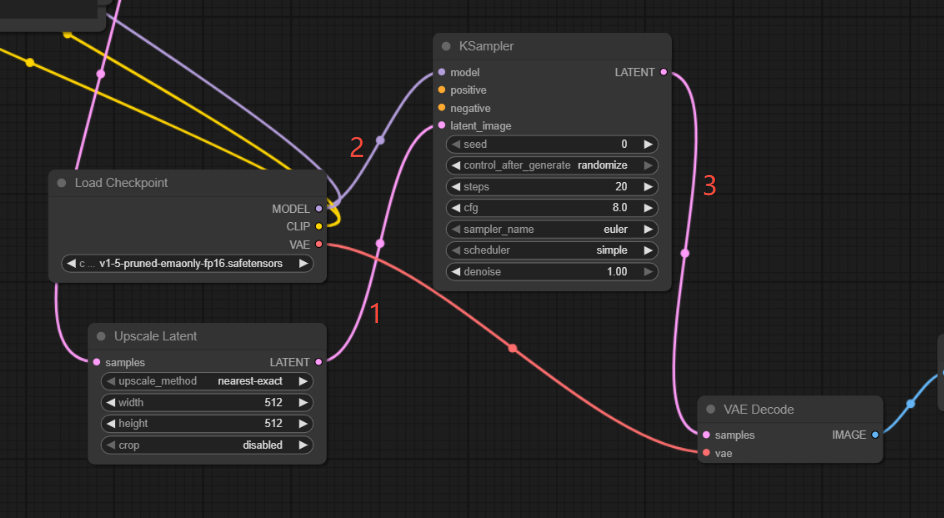
2.3 Example Settings (for Realistic Portraits)
Here’s a reference setup for realistic-style portraits:
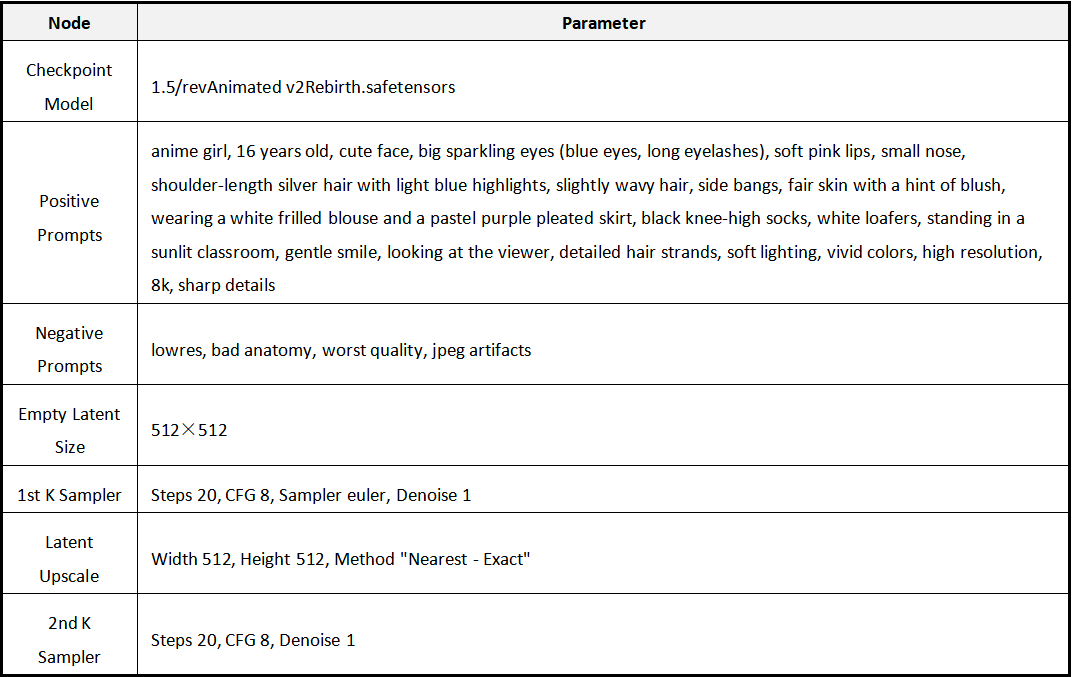
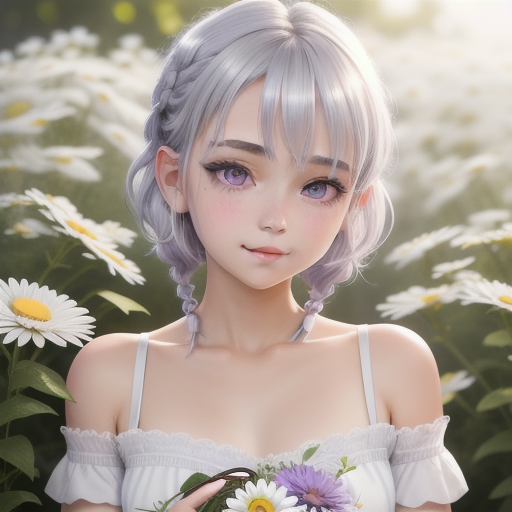
After configuring everything, click Add Prompt Queue to generate the final high-res portrait.
Right-click on the Preview Image node to save the output.
3. Tips & Summary
Model-Based Upscaling
Pros: Fast and easy to use.
Best for: Quickly improving image clarity.
High-Resolution Fix Upscaling
Pros: Repairs details, improves hands and facial structure.
Cons: Slower to generate.
Best for: High-quality, realistic, or artistic works.
Suggestions:
Start with Model-Based Upscaling to get familiar with node connections.
Once you’re comfortable, try High-Resolution Fix Upscaling for superior detail and visual quality.
Unlock Full-Powered AI Creation!
Experience ComfyUI online instantly:
https://market.cephalon.ai/share/register-landing?invite_id=RS3EwW
Join our global creator community:
https://discord.gg/MSEkCDfNSW
Collaborate with creators worldwide & get real-time admin support.