SD UpScale for High-Definition Enlargement: A Practical Guide to Boosting Image Quality in ComfyUI

High-definition upscaling is a frequent requirement in image processing. While ComfyUI offers various methods for enlargement, many require complex node setups or yield limited results. The SD UpScale extension provides a more efficient solution by achieving high-quality upscaling through tiled processing, which saves both time and storage space. This guide will cover the working principles of SD UpScale, its installation process, a detailed explanation of its node parameters, and a practical case study.
How SD UpScale Works: Why It's Ideal for HD Upscaling
The core concept behind SD UpScale is to segment the image into multiple smaller blocks, upscale each block independently, and then seamlessly stitch them back together to form the complete, enlarged image. This method offers two main advantages:
- Preserves Image Quality: Local optimization prevents overall image distortion.
- Efficient Processing: Tiled processing reduces memory consumption and speeds up the generation time.It's important to note that tiling and re-painting blocks can sometimes lead to incoordination between adjacent areas. Therefore, adjusting the tile size and parameter settings is crucial to ensure global consistency.
Installing the SD UpScale Extension
SD UpScale is an extension node for ComfyUI. Follow these steps to install it:
- Open the ComfyUI interface and click the "Manager" button in the lower right corner.
- In the pop-up window, click "Install Custom Nodes," and then enter "Upscale" in the search bar on the top right.
- Locate the "SD Upscale" extension in the list and click the "Install" button.
- After the installation is complete, restart ComfyUI to start using it.Once installed, you can find the node under New Node → Image → Upscale → SD UpScale.
Case Study: Using SD UpScale to Enlarge a Realistic Portrait
The following steps demonstrate how to set up an SD UpScale workflow to enlarge a realistic-style portrait, assuming you have a base image ready.
Step 1: Set Up the Base Workflow
Load a Text-to-Image workflow and create a new "SD UpScale" node. Connect the following nodes to the SD UpScale node:
- The "image" output port of the "VAE Decode" node $\rightarrow$ SD UpScale node's "image" input port.
- The "model" output port of the "Checkpoint Loader" node $\rightarrow$ SD UpScale node's "model" input port.
- The "conditioning" output port of the positive and negative prompt nodes $\rightarrow$ SD UpScale node's "positive" and "negative" input ports.
- The "VAE" output port of the "Checkpoint Loader" node $\rightarrow$ SD UpScale node's "VAE" input port.
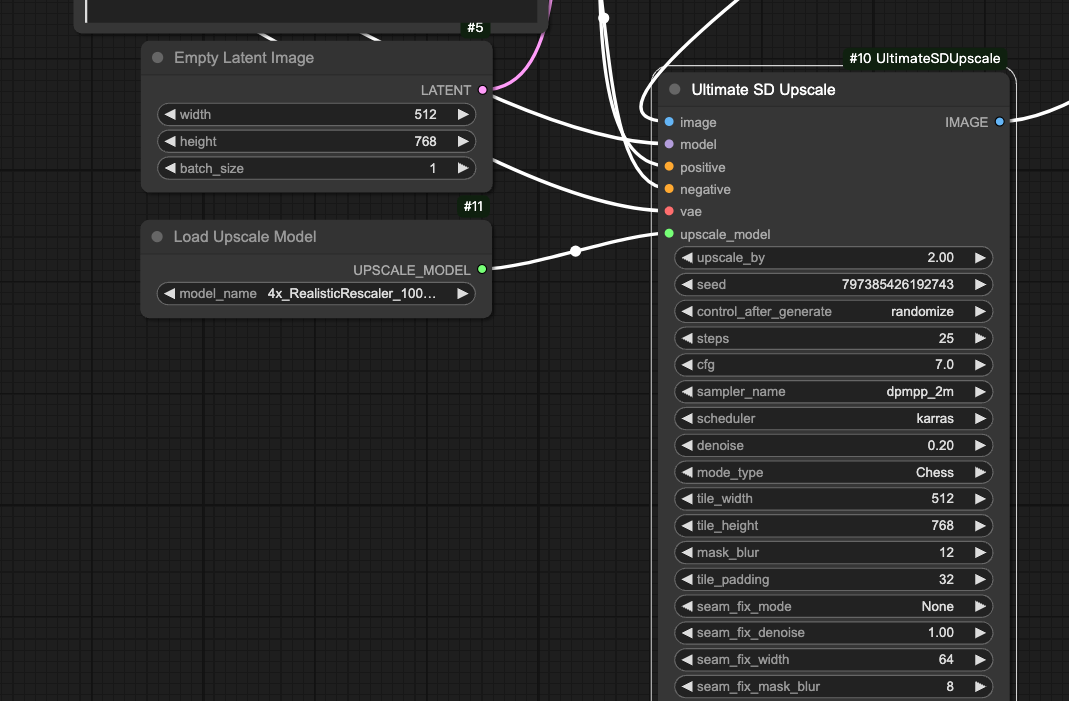
Step 2: Add Upscale Model and Preview
Create an "Upscale Model Loader" node and connect its "upscale_model" output port to the SD UpScale node's "upscale_model" input port. Then, create a "Preview Image" node and connect the SD UpScale node's "image" output port to the Preview node's "image" input port.
Step 3: Select Model and Prompts
Since we are processing a realistic portrait, select a realistic-style model in the Checkpoint Loader (e.g., realisticVisionV50).
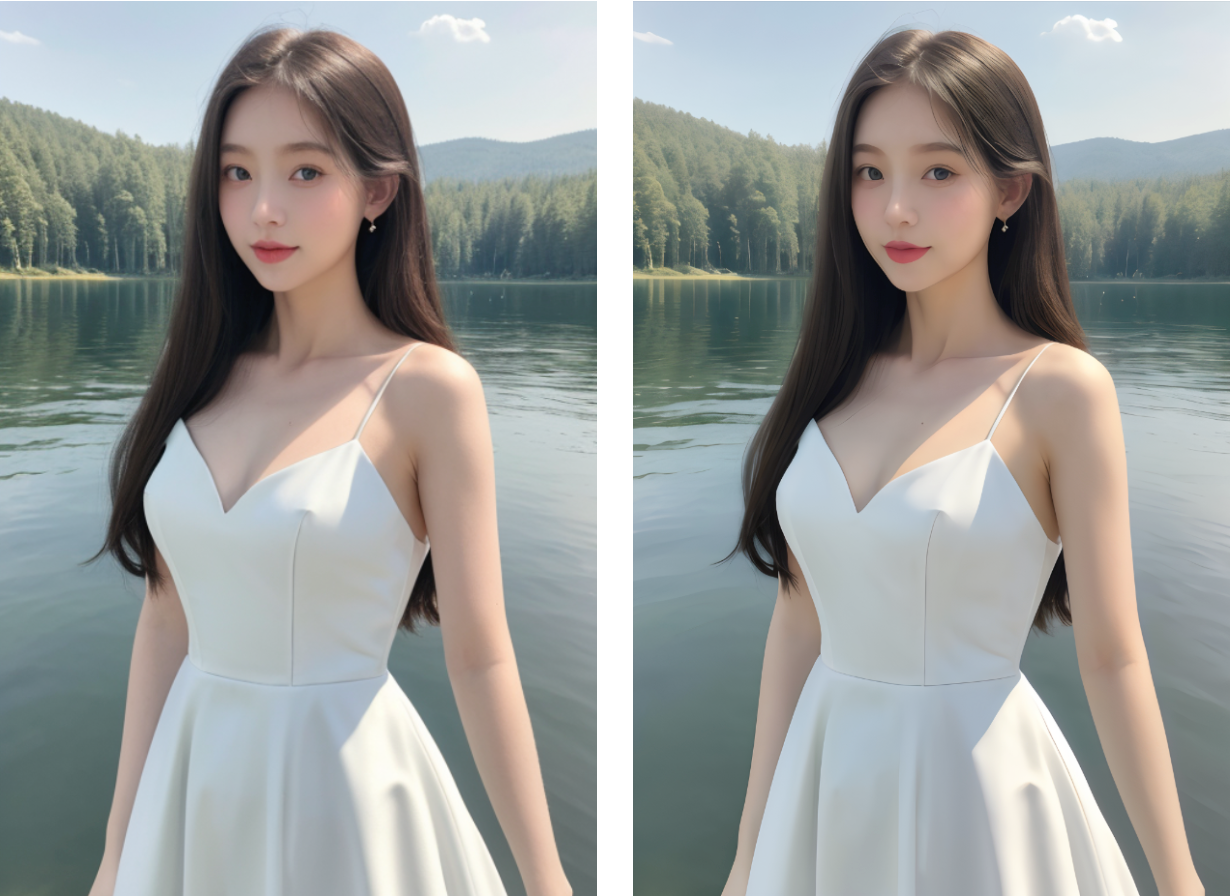
- In the Positive Prompt box, input quality descriptions such as "best quality, masterpiece, white dress, lake, upper body."
- In the Negative Prompt box, input phrases to avoid low quality, such as "lowres, text, error, blurry."
Step 4: Set Base Parameters
In the "Empty Latent" node, set the initial size of the generated image (e.g., $512 \times 768$) and set the batch size to 1. In the "Upscale Model Loader" node, select an upscale model (e.g., ESRGAN_4x.pth).
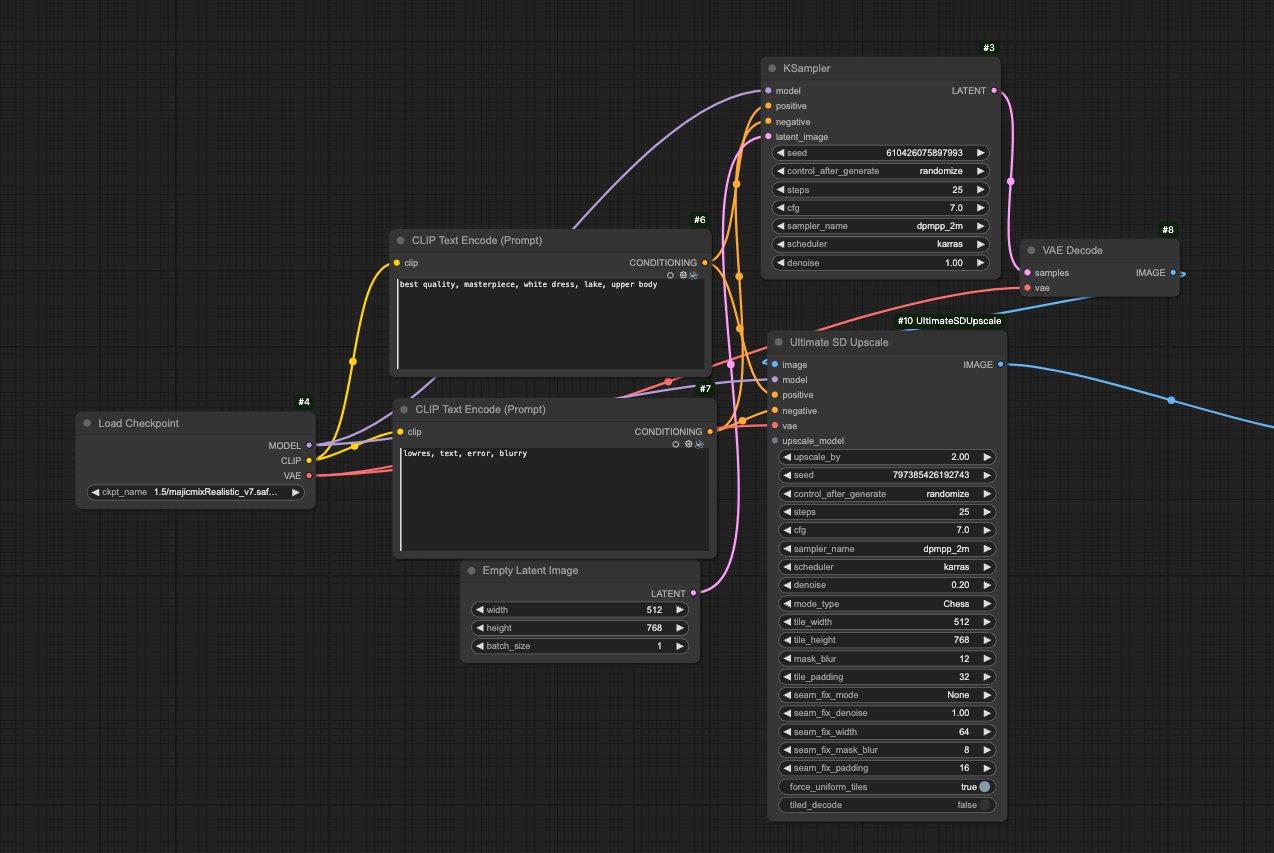
Step 5: Configure the K Sampler
In the K Sampler, set the seed to 0, the operation after running to "randomize," steps to 25, CFG to 7, sampler to "dpmpp_2m," scheduler to "karras," and denoise to 1.
Step 6: Adjust SD UpScale Node Parameters
In the SD UpScale node, set the following parameters:
- Upscale Factor: 2
- Seed: 0
- Steps: 25
- CFG: 7
- Sampler: dpmpp_2m
- Scheduler: karras
- Denoise: 0.2
- Mode Type: chess
- Tile Width: 512
- Tile Height: 768
- Bluring: 12
- Tile Padding: 32
- Seam Fix Mode: None (Keep other seam parameters at default)
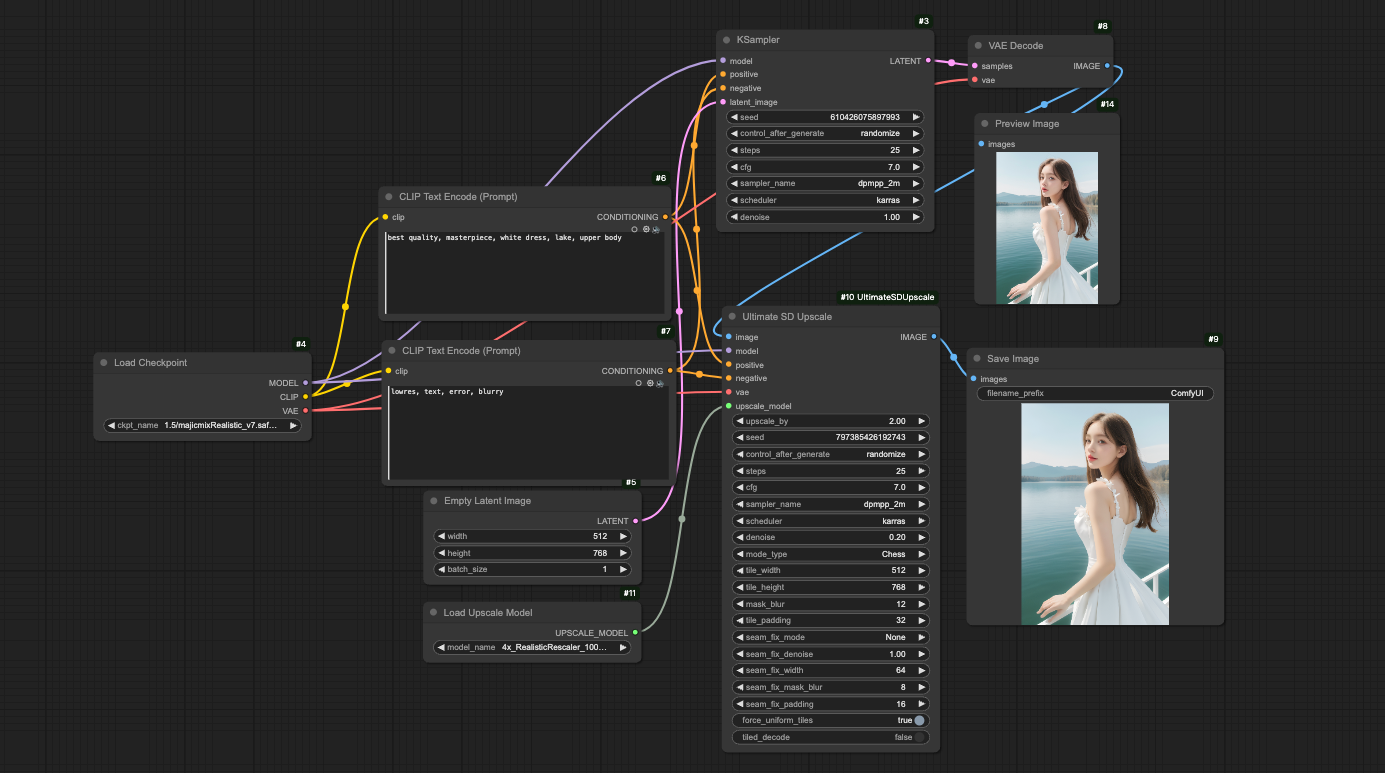
Step 7: Generate the Image
Click the "Queue Prompt" button and wait for the processing to finish. The generated image will be displayed in the preview node, featuring clear person details without any visible seams or artifacts.
Summary: Advantages and Applicable Scenarios of SD UpScale
SD UpScale is a powerful upscaling tool in ComfyUI, particularly suited for processing high-definition portraits, anime, or landscape images. By using tiled processing, it maintains detail richness while increasing resolution. For new users, the key is to adjust the tiling parameters and prompts based on the image type. As ComfyUI continues to update, SD UpScale may receive further optimizations; it is advisable to follow the official extension repository for the latest features.With this guide, you can quickly get started with SD UpScale and apply it to your daily image processing to achieve high-quality upscaling results.
Unlock Full-Powered AI Creation!
Experience ComfyUI online instantly:
https://market.cephalon.ai/share/register-landing?invite_id=RS3EwW
Join our global creator community:
https://discord.gg/MSEkCDfNSW
Collaborate with creators worldwide & get real-time admin support.